What is Google Tag Manager?
Google Tag Manager is a free tag management system that has collected all necessary SEO tags and 3rd-party code snippets in one place. It includes Google Analytics, Google Ads, Remarketing tags, advertising code snippets, and more. You can easily drag them into your Drupal 10 website without editing the website's code, thanks to the Drupal Google Tag Manager module.
Why is Google Tag Manager a Great Tool for Your Drupal 10 Website?
Here, the Drupfan web developers outline how Google Tag Manager can benefit your Drupal website.
Firstly, GTM can track users’ activity on your Drupal website. Here is the list of the most common activity on the site:
- Contact form submissions
- Call-to-action buttons clicks
- Links clicks
- Events registration
- Video views
- Shopping cart activities
- File downloads
- and more
As a result, you receive valuable information about users’ behavior on your Drupal website which can be further used in order to develop a strategy for enhancement of user engagement rates and growth of the customer satisfaction level.
Installing Google Tag Manager on Your Drupal 10 Site
The Drupfan developers created a step-by-step guide, so you can integrate Google Tag Manager into your Drupal 10 website effortlessly. This process consists of the following steps:
- Install Google Tag Manager Drupal module to your website.
- Create a personal profile for GTM.
- Copy the Container ID
- Manage simple configurations in the Drupal module.
- Verify that the Container ID is available on your website.
Let’s look into each step of installing Google Tag Manager to the Drupal 10 website in more detail.
Install Google Tag Manager Drupal module to your website
First things first: open Composer and install the Google Tag Manager module (google_tag) to your Drupal 10 website. You can do that by simply entering this command into the console:
composer require drupal/google_tag

You will see this if the installation was successful:
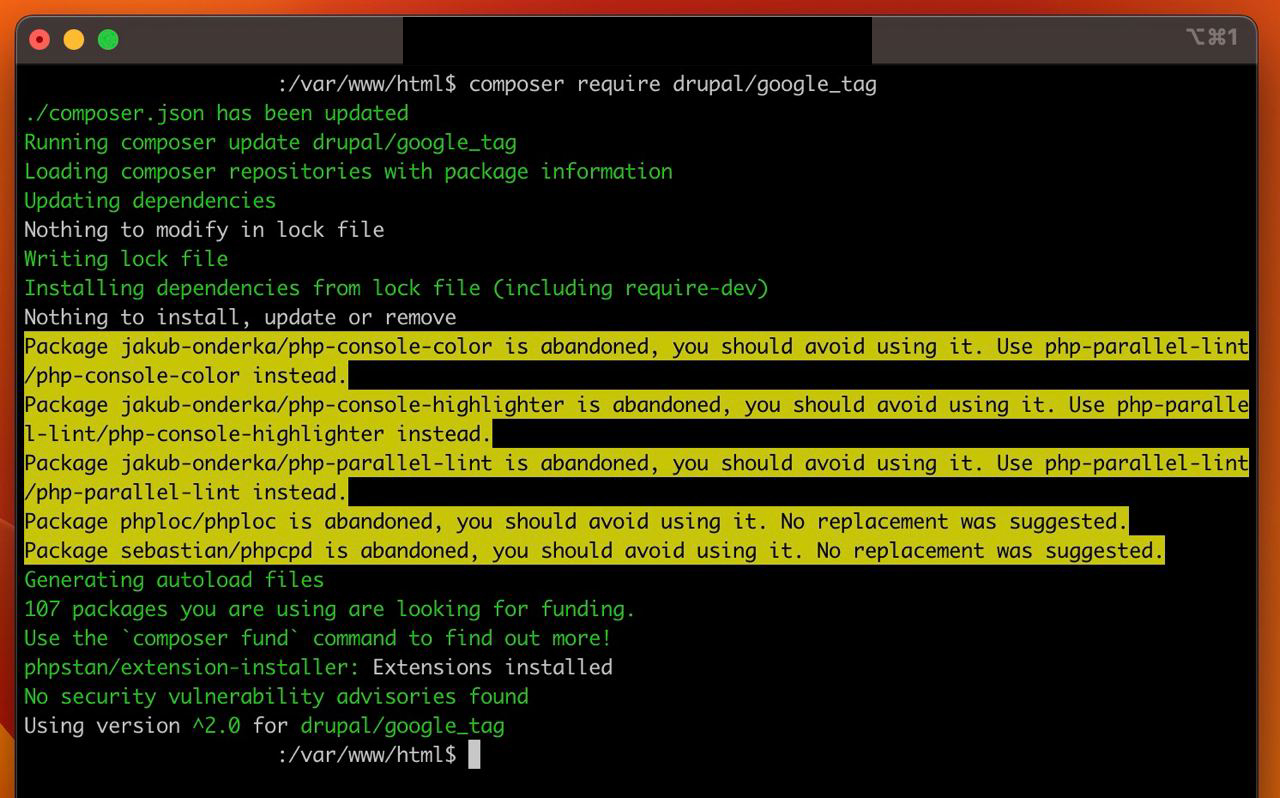
Then, go to the admin panel on your Drupal website and click on the ‘Extend’ tab. Find the GT module and activate it by putting a checkmark in the box. Don’t forget to click ‘Install’ at the bottom of the web page.
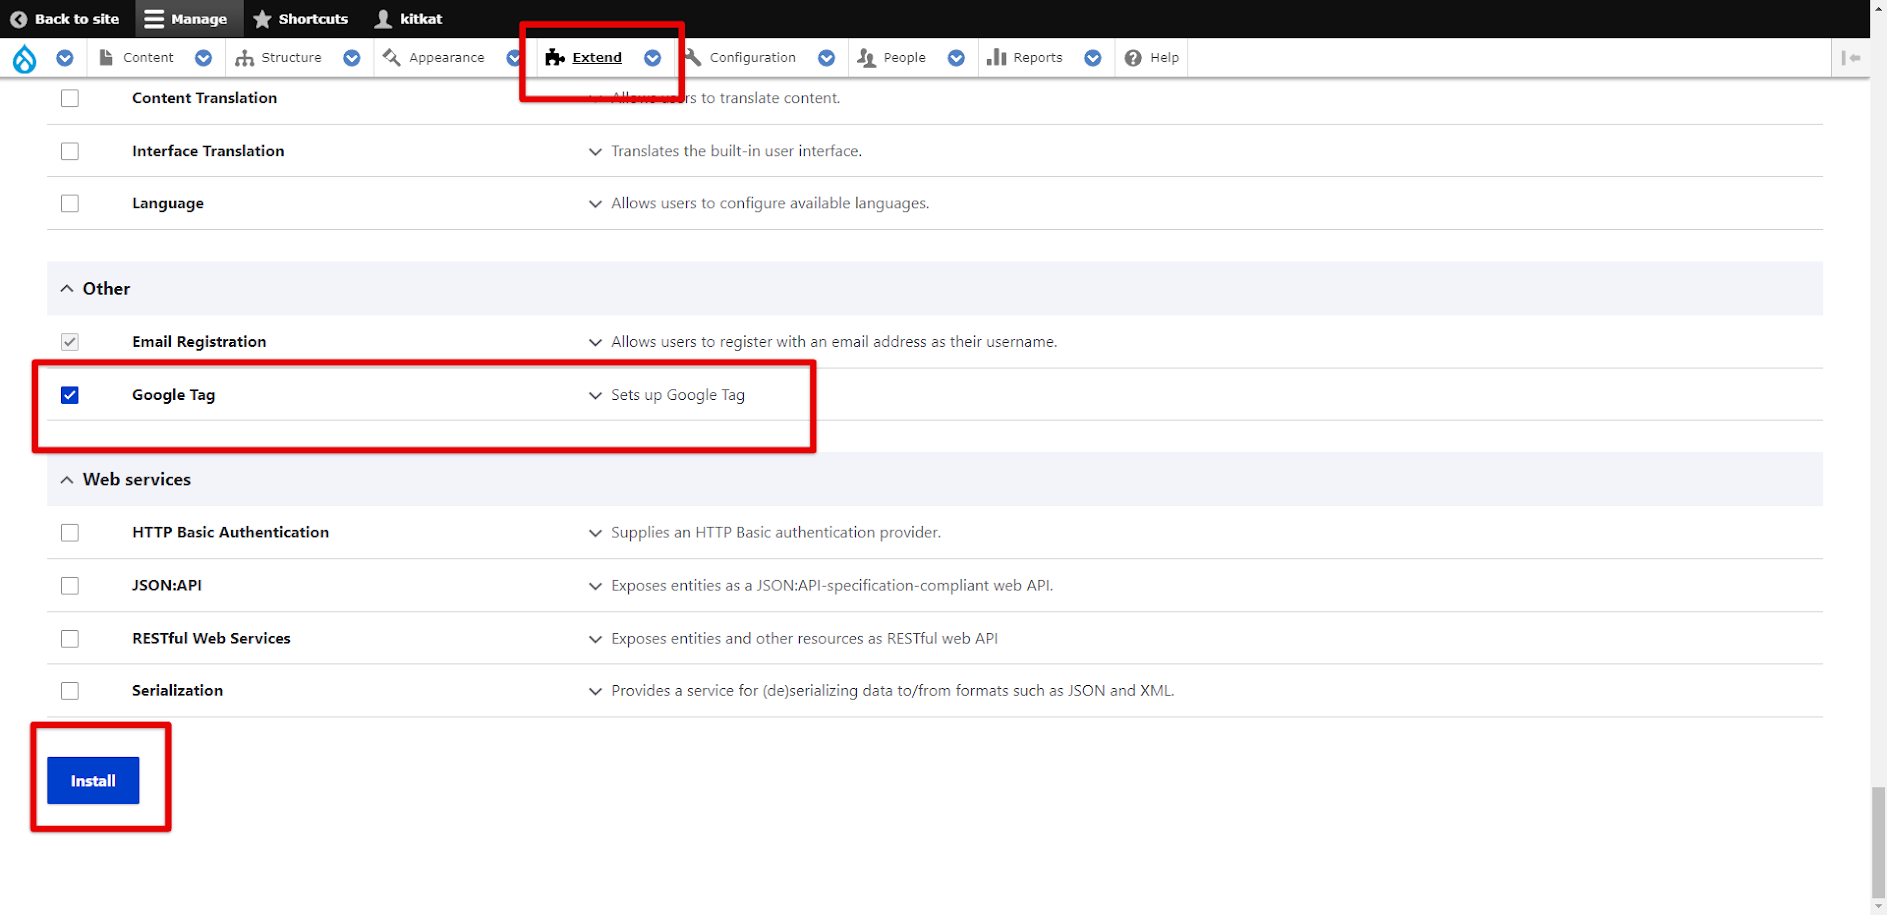
Congrats! You now have a Google Tag module installed on your Drupal 10 site.
Create a personal profile for GTM
Now you need to create a GTM account if you don’t already own one. Go to the Google Tag Manager website and log in via your Google credentials. After you are logged into the system, click on ‘Create Account’.
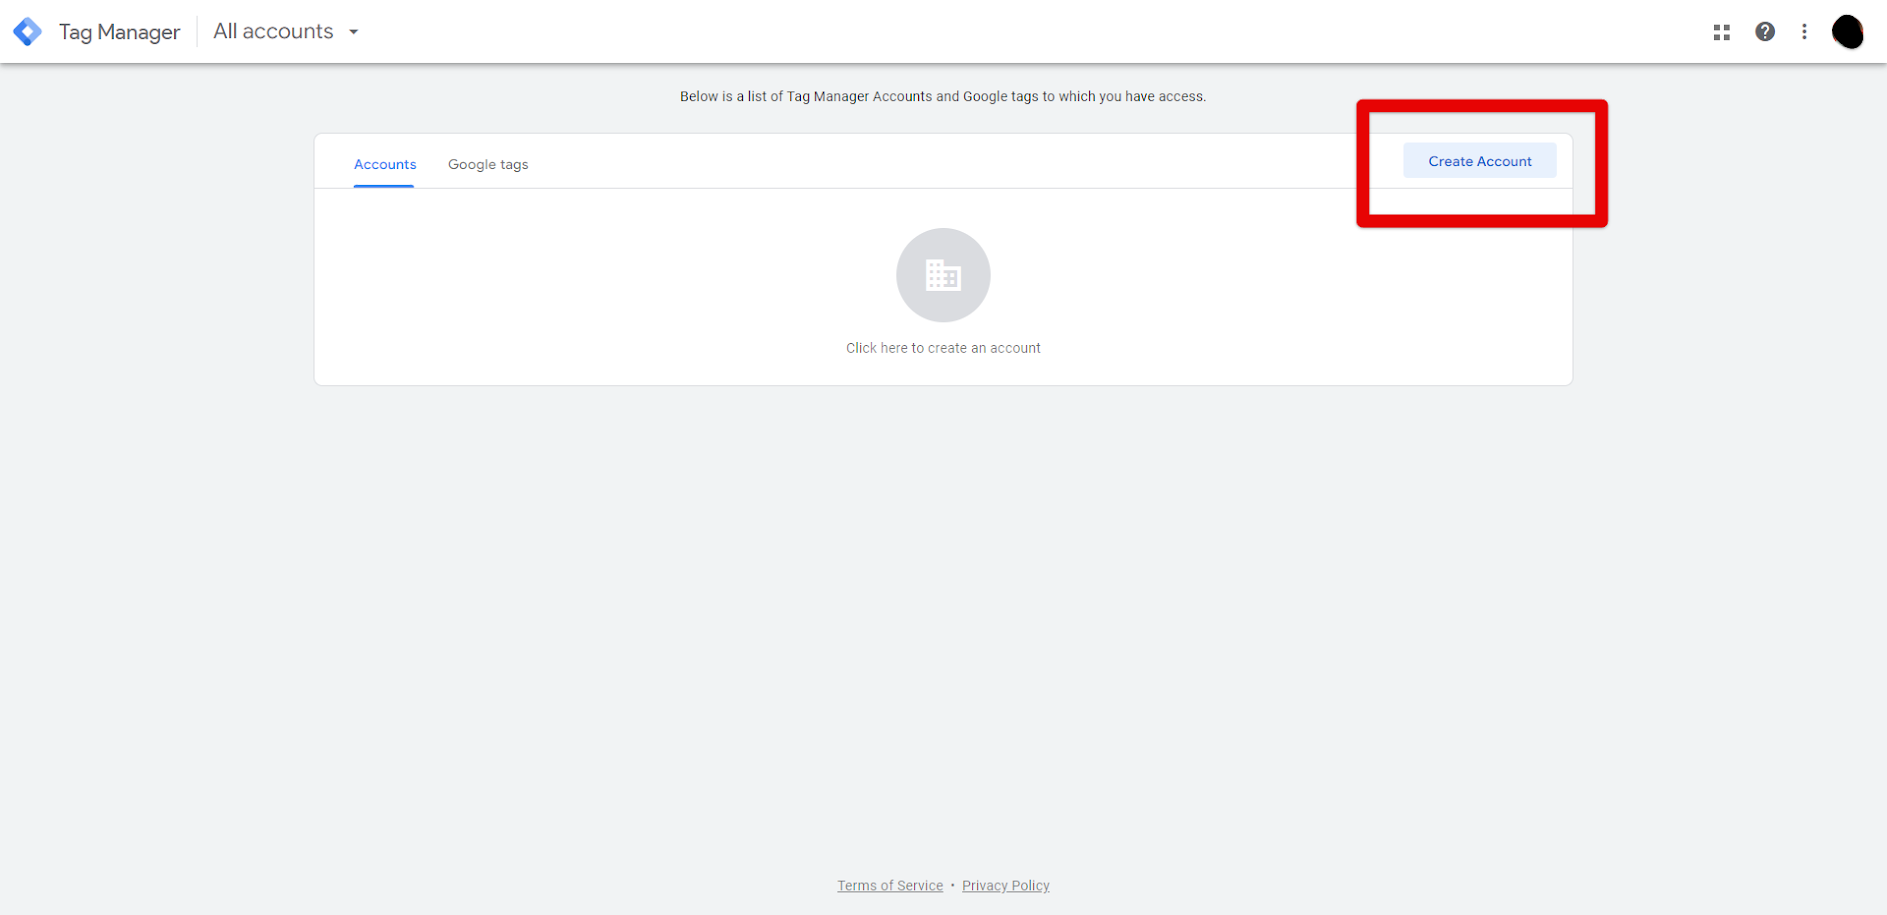
Fill out all the necessary information, like account name, country, and container setup (choose Web for Drupal 10 website) and click on ‘Create’.
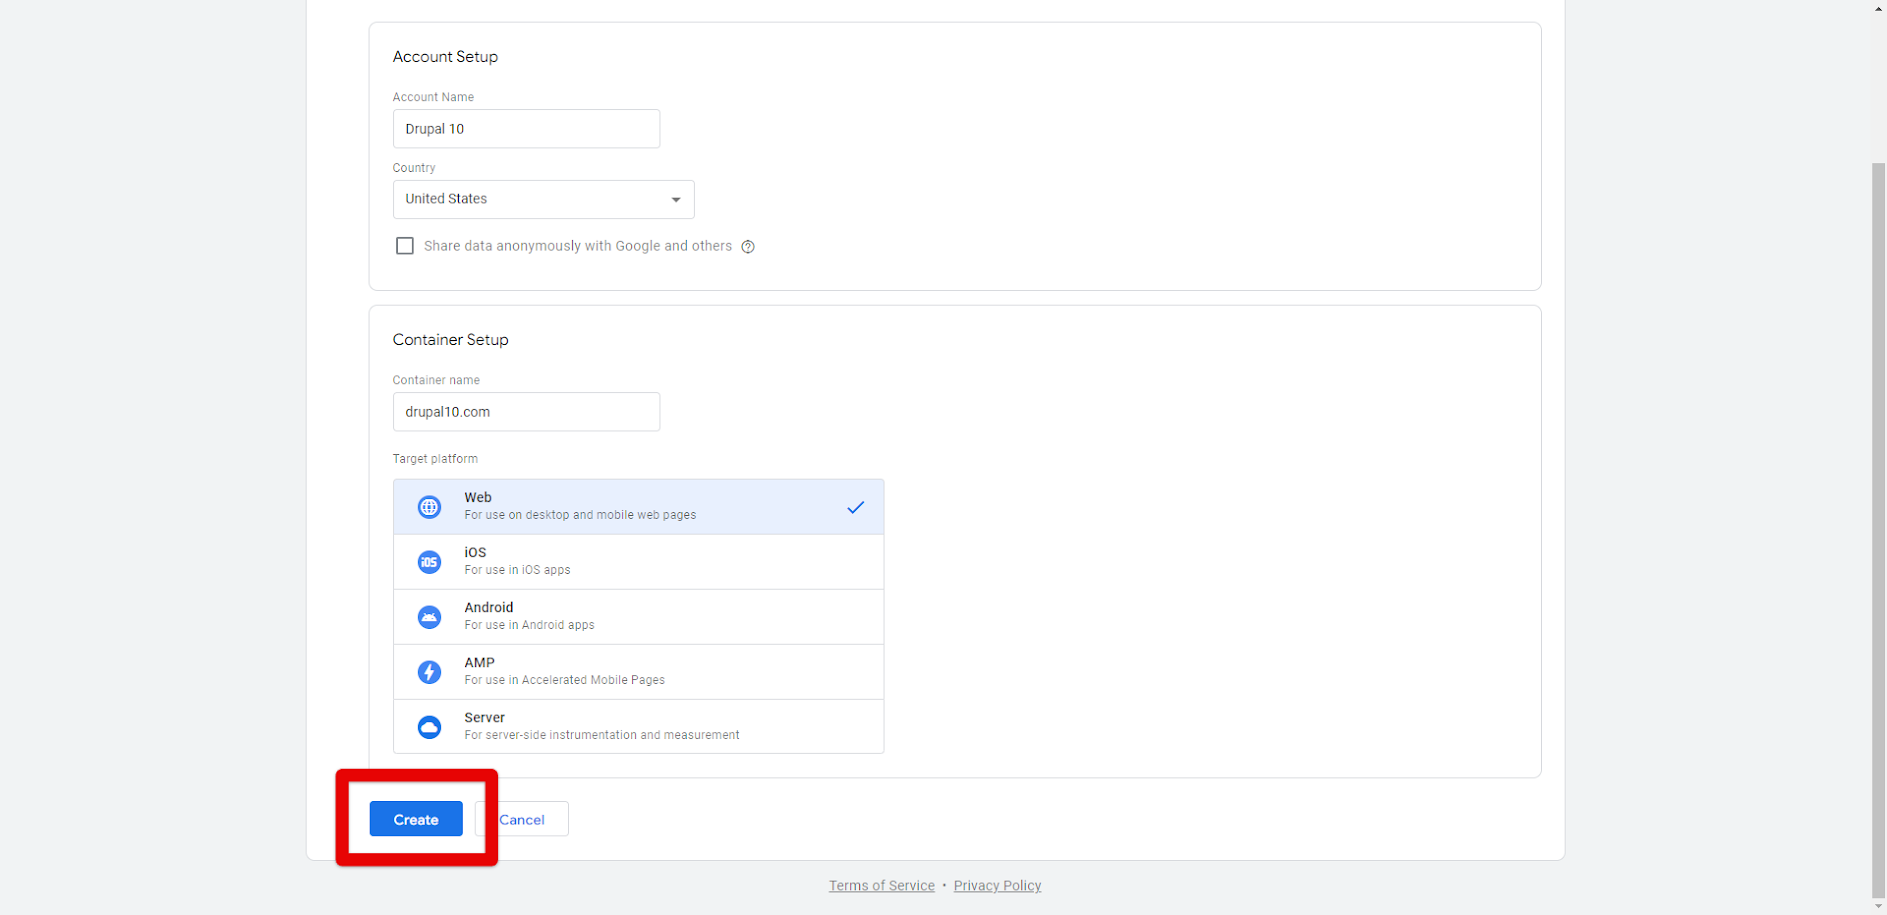
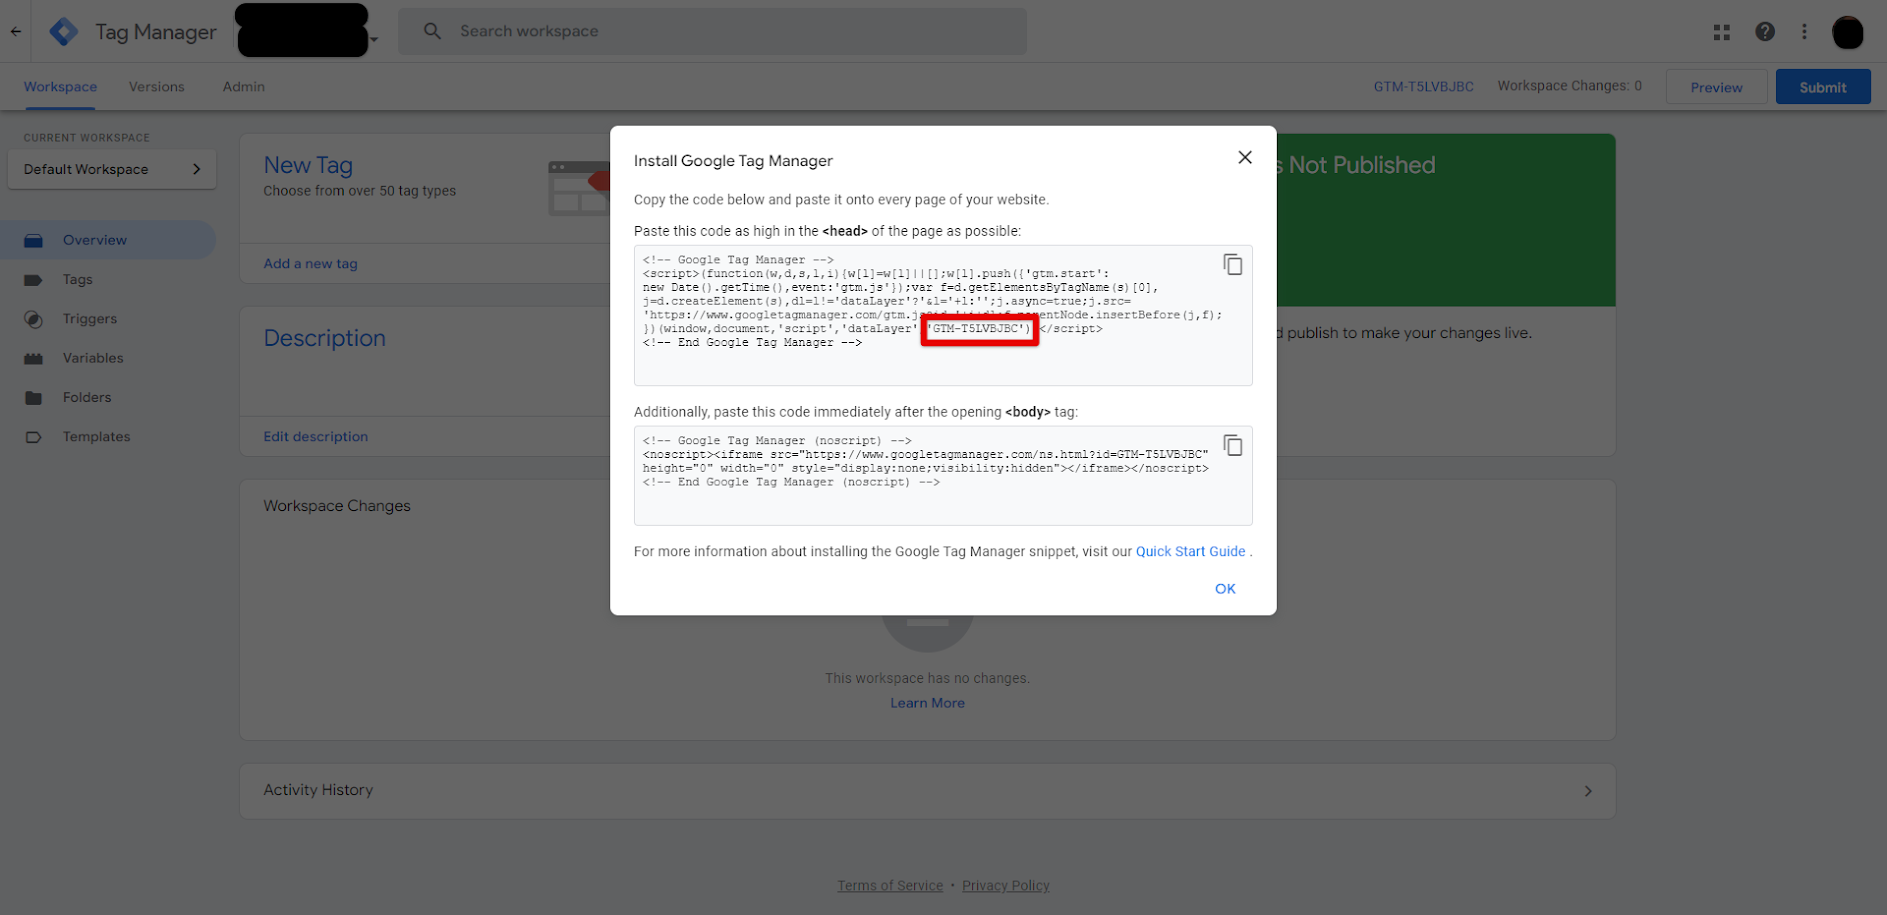
Copy the Container ID
After setting up an account, you’ll see the code snippets on your screen. Copy the container ID from it.
Manage simple configurations in Drupal module
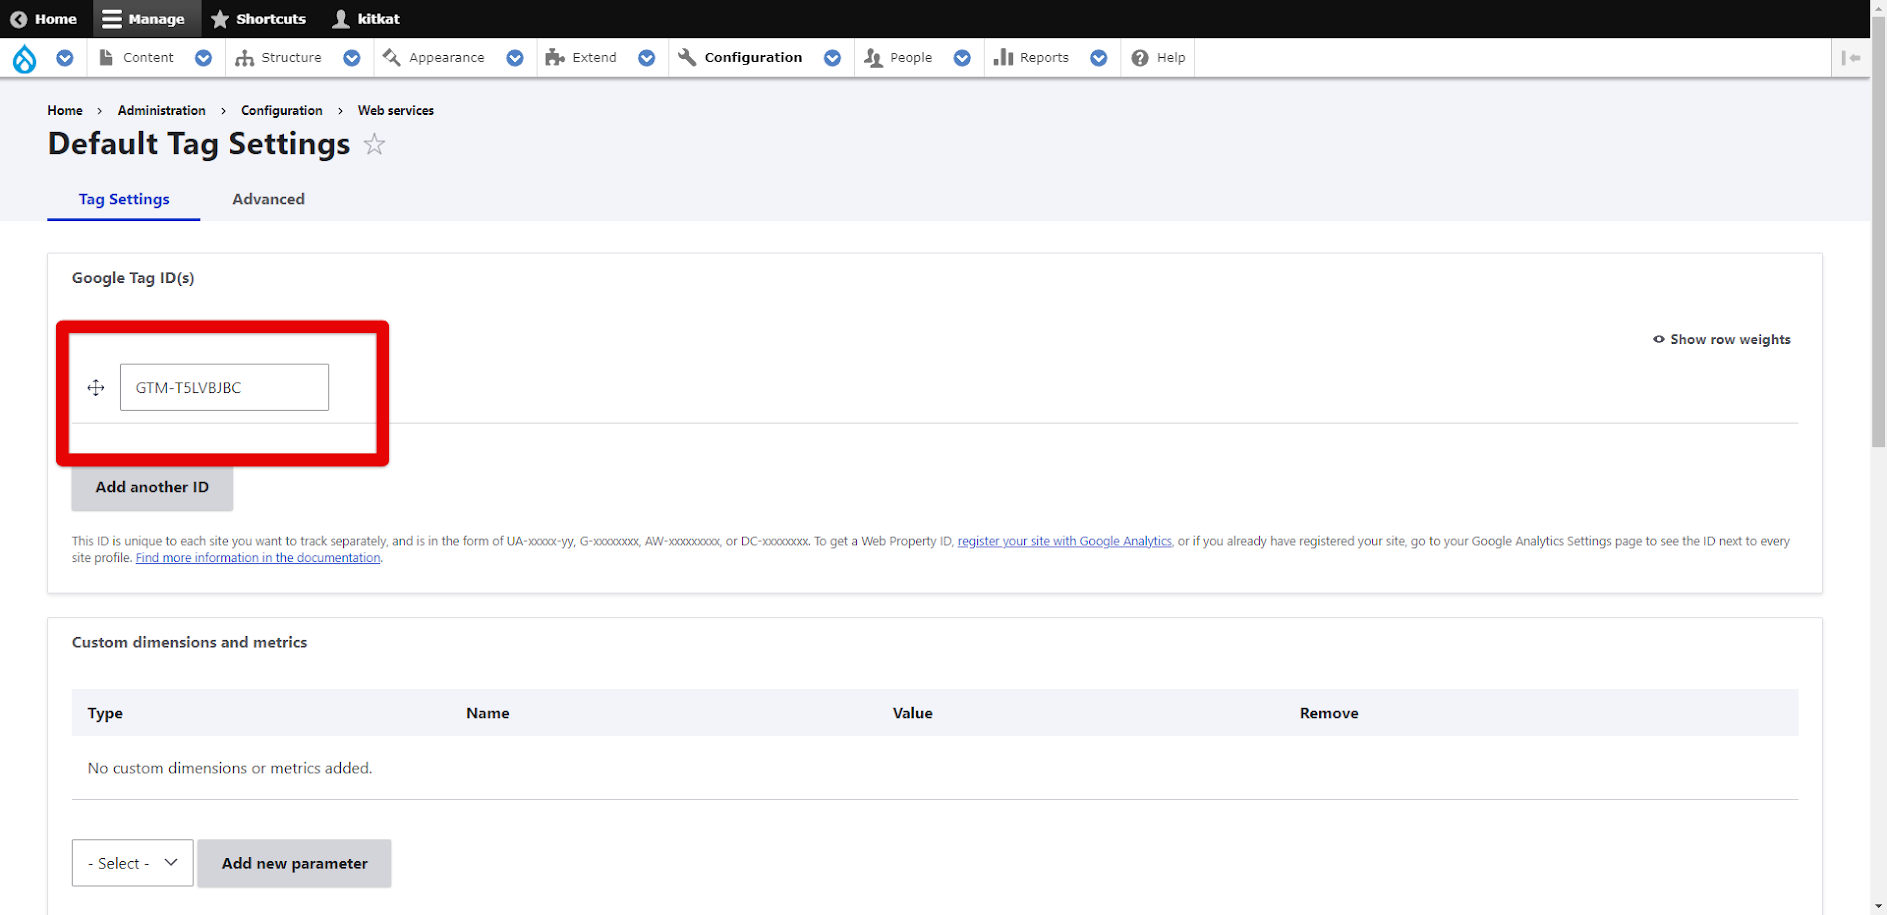
Go back to your site. Click the ‘Configuration’ → ‘Web Services’ → ‘Google Tag’ tab in the admin toolbar. You’ll now see the Tag Settings container. Paste your Container ID into Google Tag ID(s) raw. Don’t forget to hit ‘Save’ at the bottom of the web page.
Verify that Container ID is available on your website
Go to your website’s Homepage and use Inspect Elementor to see the website’s code. Search for ‘Google Tag’ in Inspect Elementor. If you did everything right, you’ll see a GT script like the one in the screenshot below (highlighted yellow)

To Conclude
By following this simple step-by-step guide, you can integrate Google Tag Manager with your Drupal 10 website at no effort. After GTM is installed on your site, you can connect Google Analytics or any other tools using your GTM profile. Simply create a new tag and paste it to the appropriate line on your website.
If this guide is not clear enough, you can always contact the Drupfan web development team, so we can install Google Tag Manager on your Drupal 10 website. Do not hesitate to contact us if you encounter any GTM-related issues on your site as well.


