What Are the Benefits of the Drupal Webform Module?
The Webform module is the most powerful and highly customizable Drupal 10 solution available today for building any type of form and collecting any kind of user data. Whether you need a simple contact form, a multi-step registration process, or a complex survey, this builder offers unmatched flexibility. It’s widely used to create single-page or multi-step registration forms, quizzes, polls, and more. Beyond its core functionality, the Webform module also includes features like email handler configuration for both users and administrators.
Here are some of the key advantages of the Drupal Webform module:
- The Webform module is open-source (free) and offers extensive functionality right out of the box. Like any content type or Drupal module, it may require configuration if you lack technical expertise. The Drupfan Drupal specialists can help set up and fine-tune your webform element structure.
- Webforms are highly customizable in UI and layout, with support for CSS styling, and can be displayed as a page, block, pop-up, and more.
- Built-in email handler functionality allows you to automate notifications and confirmations.
- You can export submission results in CSV format with a single click.
- The module supports conditional logic, enabling dynamic forms that adapt to user input.
- Use token integration for personalized messages and automated field population.
As you can see, the Webform module is the quickest and most efficient way to create fully functional forms on Drupal 10 websites. From simple webform elements to complex conditional structures, this builder makes form creation both easy and professional.
Brief Tutorial to Drupal 10 Webform Module
The best way to learn how to create forms and understand the Webform module is to try it out. Follow this simple guide to get started with webforms on Drupal.
In this guide, we are talking about the Webform module in terms of Drupal 10. If you are using older Drupal versions, it is high time to think about Drupal migration or update.
1. Installing the Webform Module
To add the Webform module to your Drupal website, open your console and run:
composer require drupal/webform
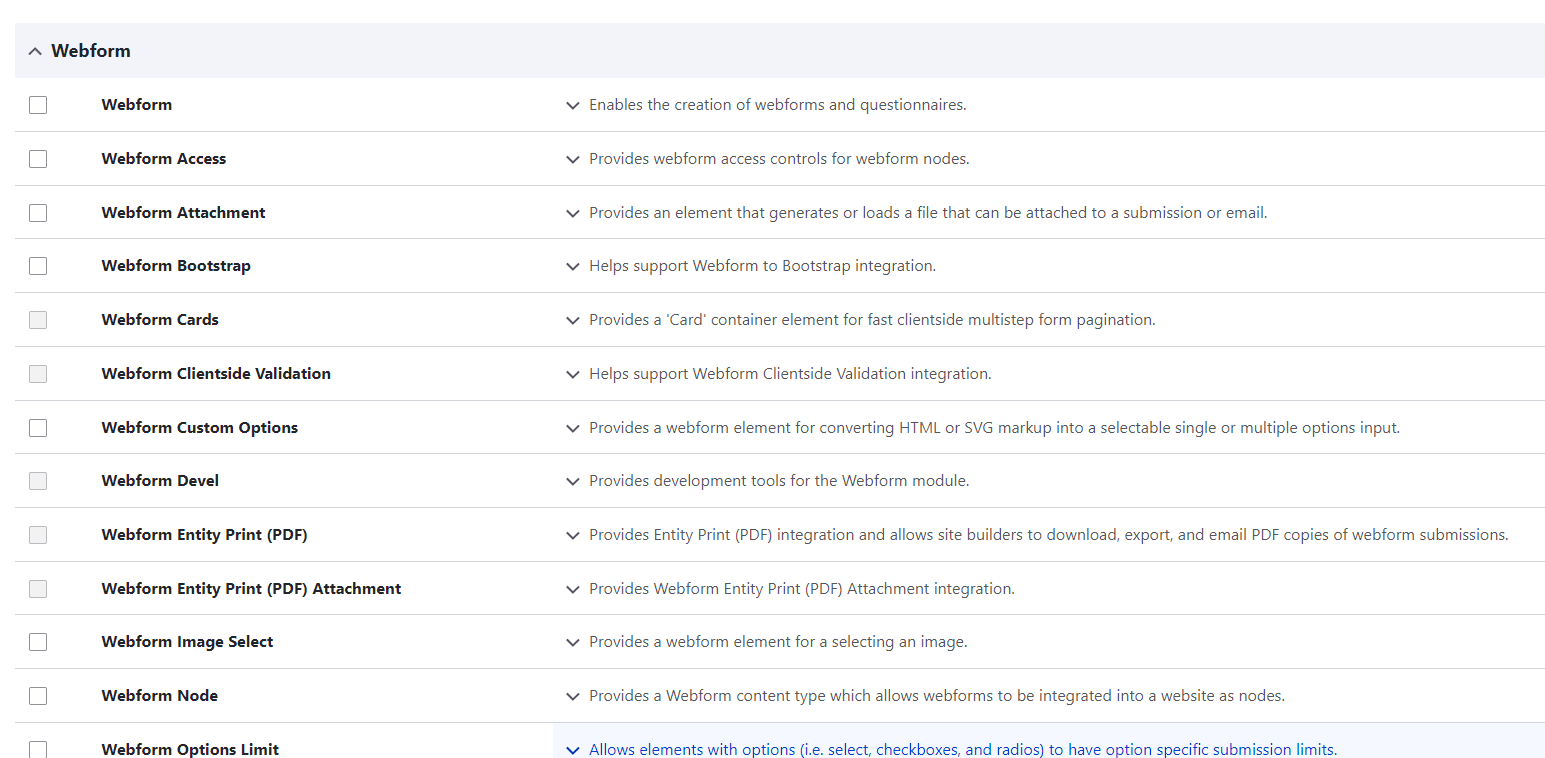
Next, head over to the Extend tab in your admin toolbar, search for Webform (just the plain one, not the extras), and enable it.
Tip from our tech team: If you’re on Drupal 10, make sure the core modules Field API, System, and User are enabled first, otherwise, the Webform won’t even say hello.
Once Webform is active, you’ll see a bunch of extra options under it. Each one unlocks a different feature. Enable only what you need. Please dont check every checkbox just because you can.
2. Creating a webform
Before you jump into building your contact form, make sure you’ve got the right Webform settings in place. First, enable Webform UI, Webform Node, and Webform Access.
- Webform UI gives you a clean, intuitive interface so creating and editing forms feels less like a chore and more like a quick drag-and-drop.
- Webform Access helps you control who can view, edit, or submit forms, handy when you’re dealing with private data.
- Webform Node creates a dedicated content type, so your form can live on your site as a full-fledged page (aka node).
Once these are switched on, head over to Structure → Webforms in the admin menu. From there, you can start customizing fields, add a dropdown or two, tweak the YAML source, hook it up to an API, or even save it as a template for future forms.
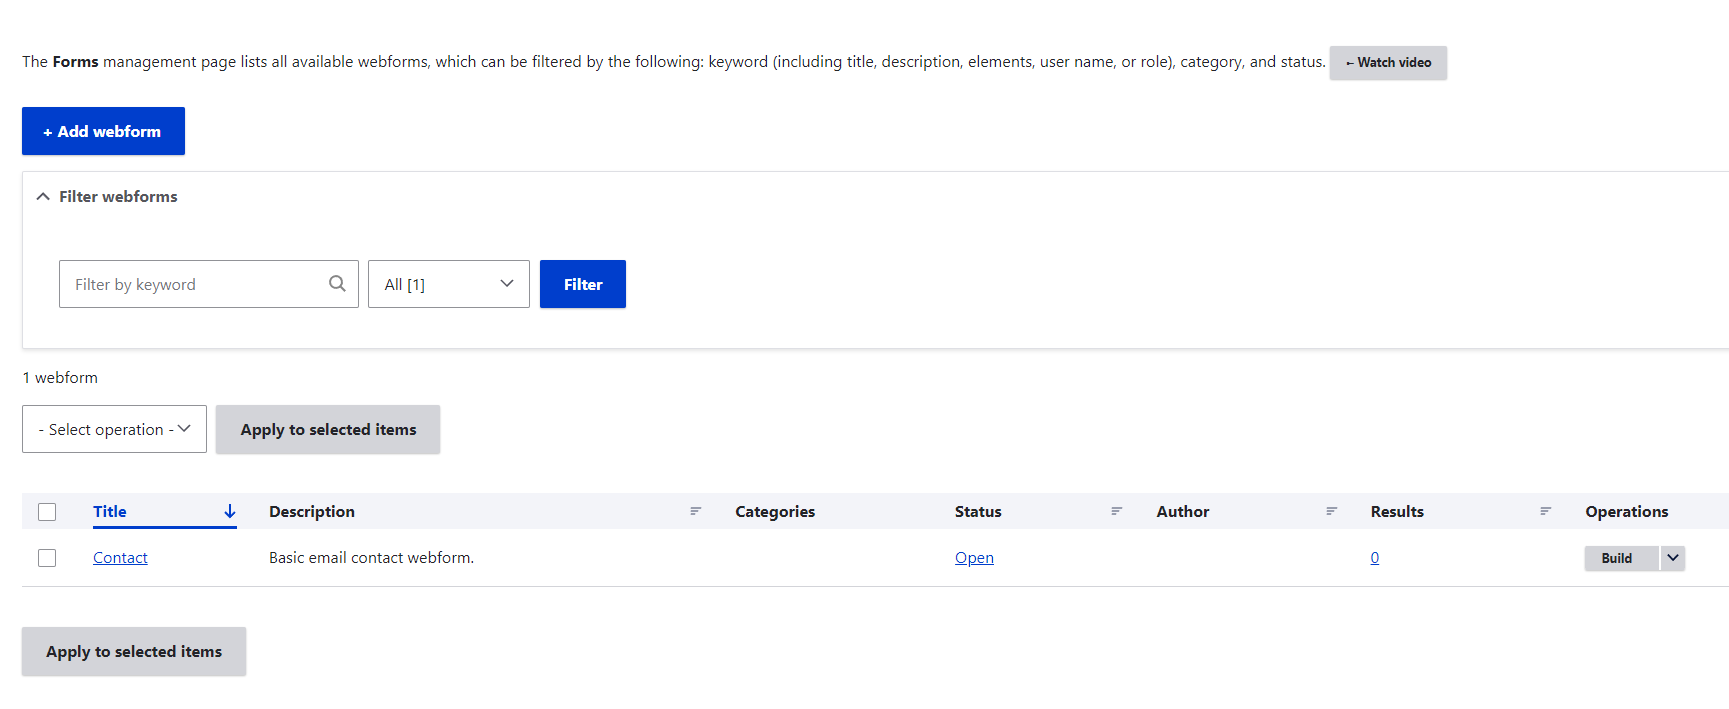
To build a new webform:
- Click on ‘+ Add webform’.
- Fill out the fields Title and Administrative description.
- Choose ‘Open’ status to make it available to the users.
Click on ‘Save’.

The webform is now created and is waiting for further configurations!
3. Configuring the webform.
Once you hit ‘Save’, the webform’s configuration page will open up. To start adding fields, click ‘+ Add element’. This will bring up a handy pop-up showing all the available options. From here, you can quickly build forms, embed add-ons, or even fine-tune with YAML markup if you prefer. It’s also a great place to predefine settings for a smoother form-building flow.
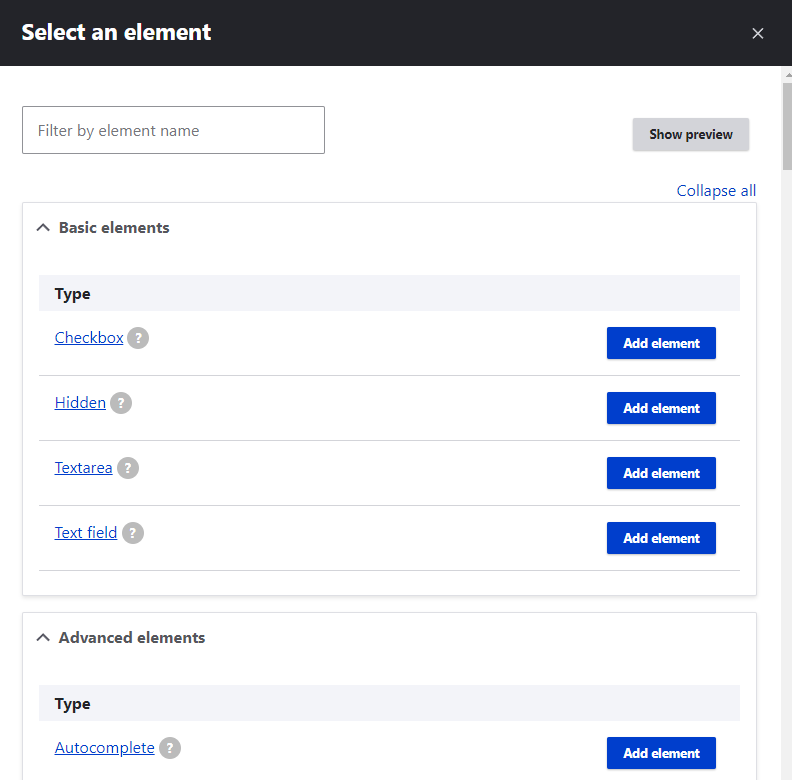
Click on ‘Add element’ to add the required field. You’ll now see another pop-up on the right side of your screen with field configurations. Fill out the required fields. We chose the ‘text field’ and named it ‘First Name’. After filling out the necessary info, click on the Save button.
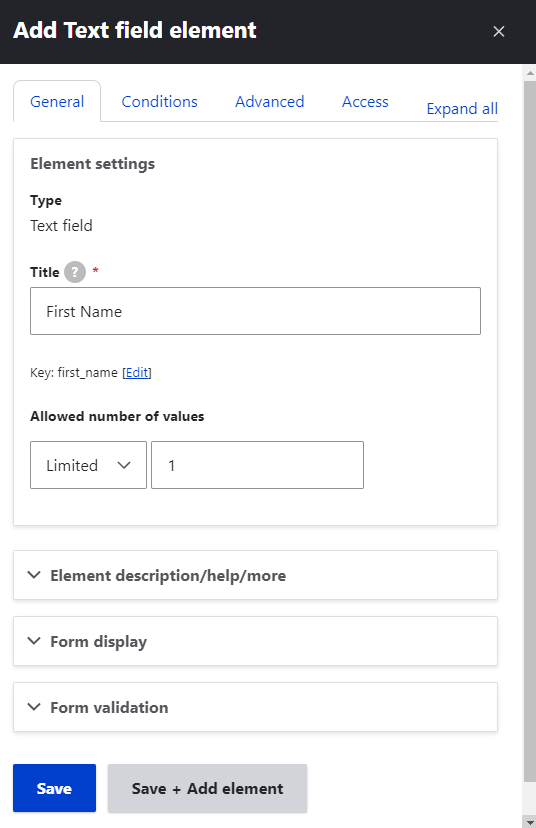
Note: if the field is required, put a checkmark under ‘Required’.
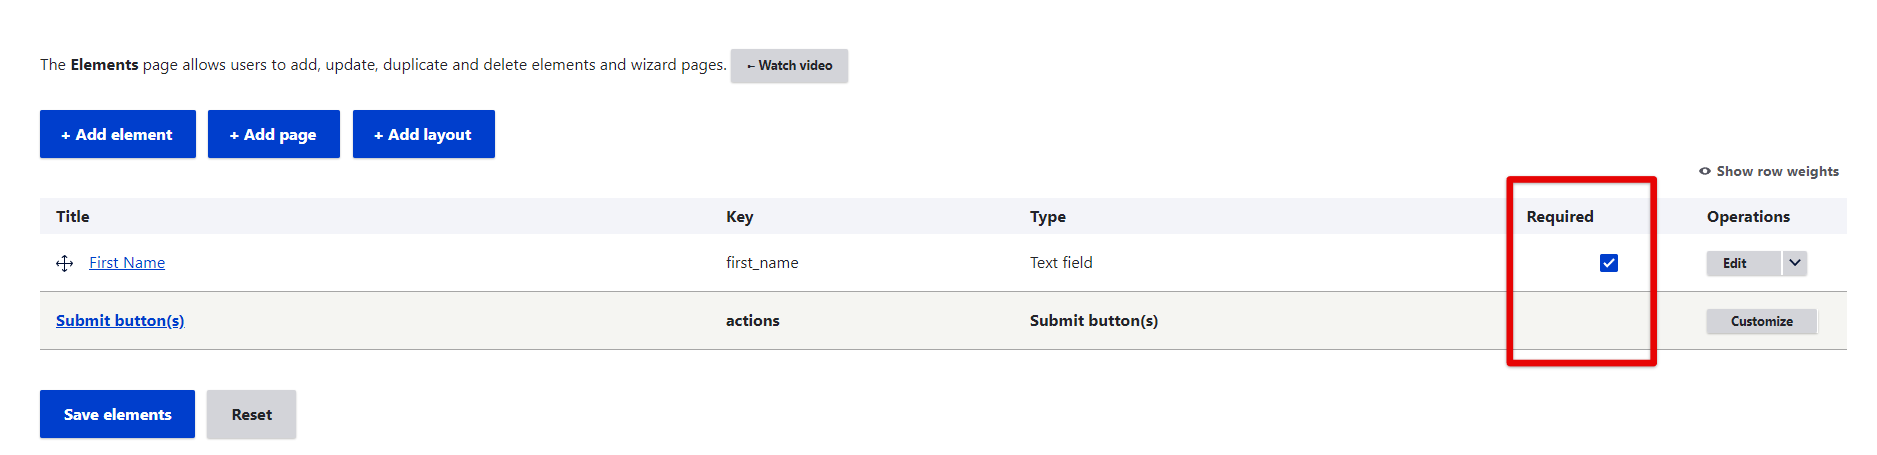
Let’s add some more fields. Then, view your webform by clicking on the ‘View’ tab.
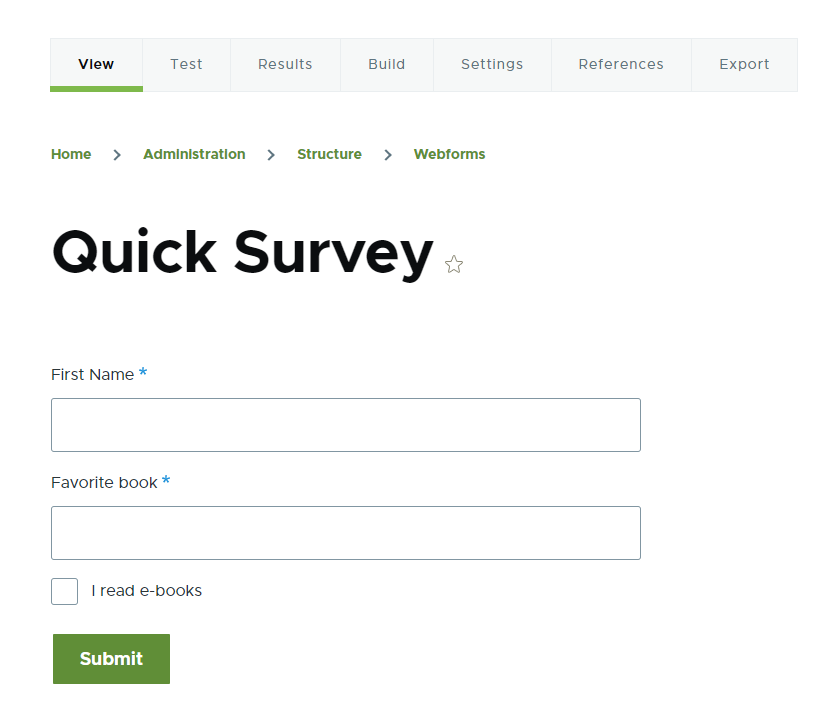
In the ‘Test’ tab you can test a webform: the fields will be auto-filled with random values. In the ‘Result’ tab, you can view, download, or delete submissions.
4. Adding content to the webform.
Since we’ve enabled the Webform Node module, it’s now possible to create a dedicated Drupal Webform content type. This content type includes standard fields like Title and Body, plus a Webform field. Under the Webform field, you’ll find a drop-down menu listing all available forms.
To create a Webform content type in Drupal 9 Webform module, simply navigate in the admin menu to:
Content → Add content → Webform. From there, you can configure fields, enable the webform, and even add custom options like radio buttons before you submit the webform.
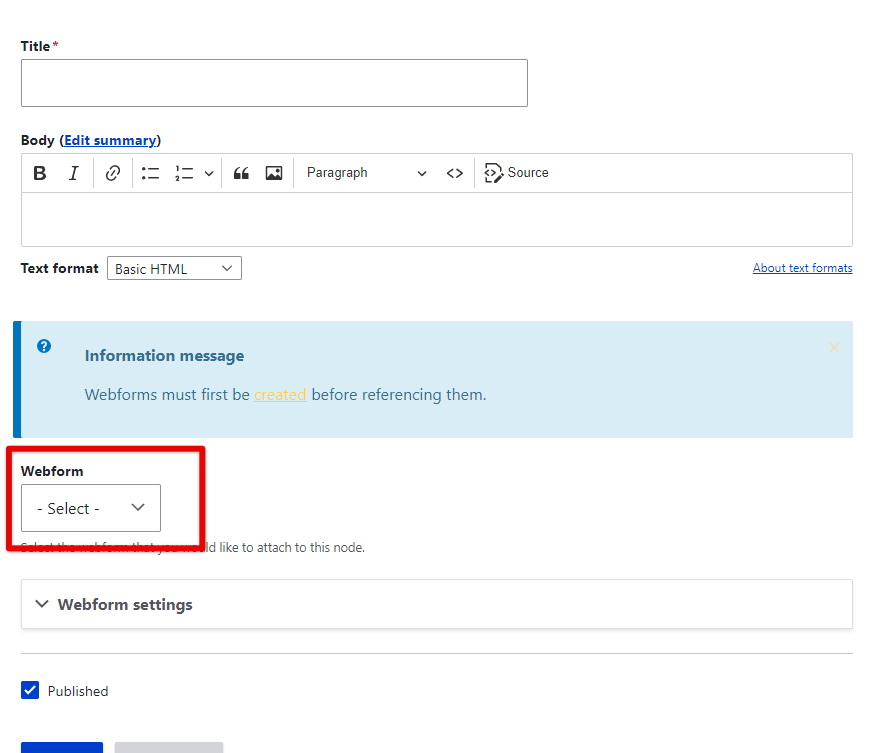
Fill out all the necessary content to create a Webform node and choose a required Webform field from the drop-down list. Then, under ‘Webform settings’, you can choose the status of your webform in Drupal:
- Open: if you want to make it open for users.
- Closed: when submissions are no longer required.
- Scheduled: will offer fields with start and closure days for the webform.
Whether you’re using the Webform module for Drupal 8, Drupal 9, or Drupal 10, the process is similar. Once done, you can build Drupal webforms, create a new webform, and even add conditional logic for advanced functionality.
Congrats, cause now you know how to use the Webform module to create flexible forms on Drupal!
How Drupfan Specialists help with Drupal Forms
Drupfan specialists have extensive experience in creating effective, convenient and flexible forms based on the Drupal Webform module. We help businesses implement forms that best suit their goals, from simple contact forms to complex surveys and integrations.
Our key areas of assistance:
Analysis and planning of a form for your business tasks
Study your goals and needs to offer the optimal form structure taking into account logic, fields and data processing.
Creation of adaptive and user-friendly forms
Drupfan specialists develop forms with an intuitive interface that work correctly on all devices - from mobile phones to desktop computers.
Using advanced features of the Webform module
Our team use the capabilities of multi-stage forms, conditional logic, additional handlers, integration with external services (CRM, email marketing, etc.).
Customization via Drupal Form API
Flexible solutions for unique tasks, creating new fields, validators, and event handlers that cannot be implemented with basic settings.
Data collection and processing optimization
Drupfan experienced experts configure automatic saving, exporting, and analysis of form data to make it as useful as possible for business analytics and decision-making.
Post-launch form support and maintenance
Regular updates, adaptation to site changes, and quick resolution of any technical issues for smooth operation.
Summing Up
Drupfan Drupal developers have prepared a short guide covering the essentials of Drupal Webform building for non-technical users. But this is only scratching the surface. The Webform module’s capabilities, originally developed and maintained by Jacob Rockowitz, extend far beyond simple setups. From advanced form builder features to multi-step forms, integrations like Entity Print module, Remote Post handler, and deep customization through Drupal’s Form API, the possibilities are nearly endless.
Whether you need a webform module for your Drupal project to capture leads, manage a newsletter, or create complex workflows, Webform lets you add the fields, logic, and functionality your business requires.
Drop Drupfan a line today to discuss your unique requirements and build a tailored form solution with our experienced Drupal developers.