How to Use the Drupal 10 Layout Builder Module?
Although this module is available for the D8 version, we will talk about its functionality in terms of Drupal 10, as now is the high time to migrate or update your website to the 10th version. If you’re still on Drupal 8 or Drupal 7 (😱), contact the team at Drupfan for seamless and secure Drupal 10 migration.
Installing Drupal 10 Layout Builder
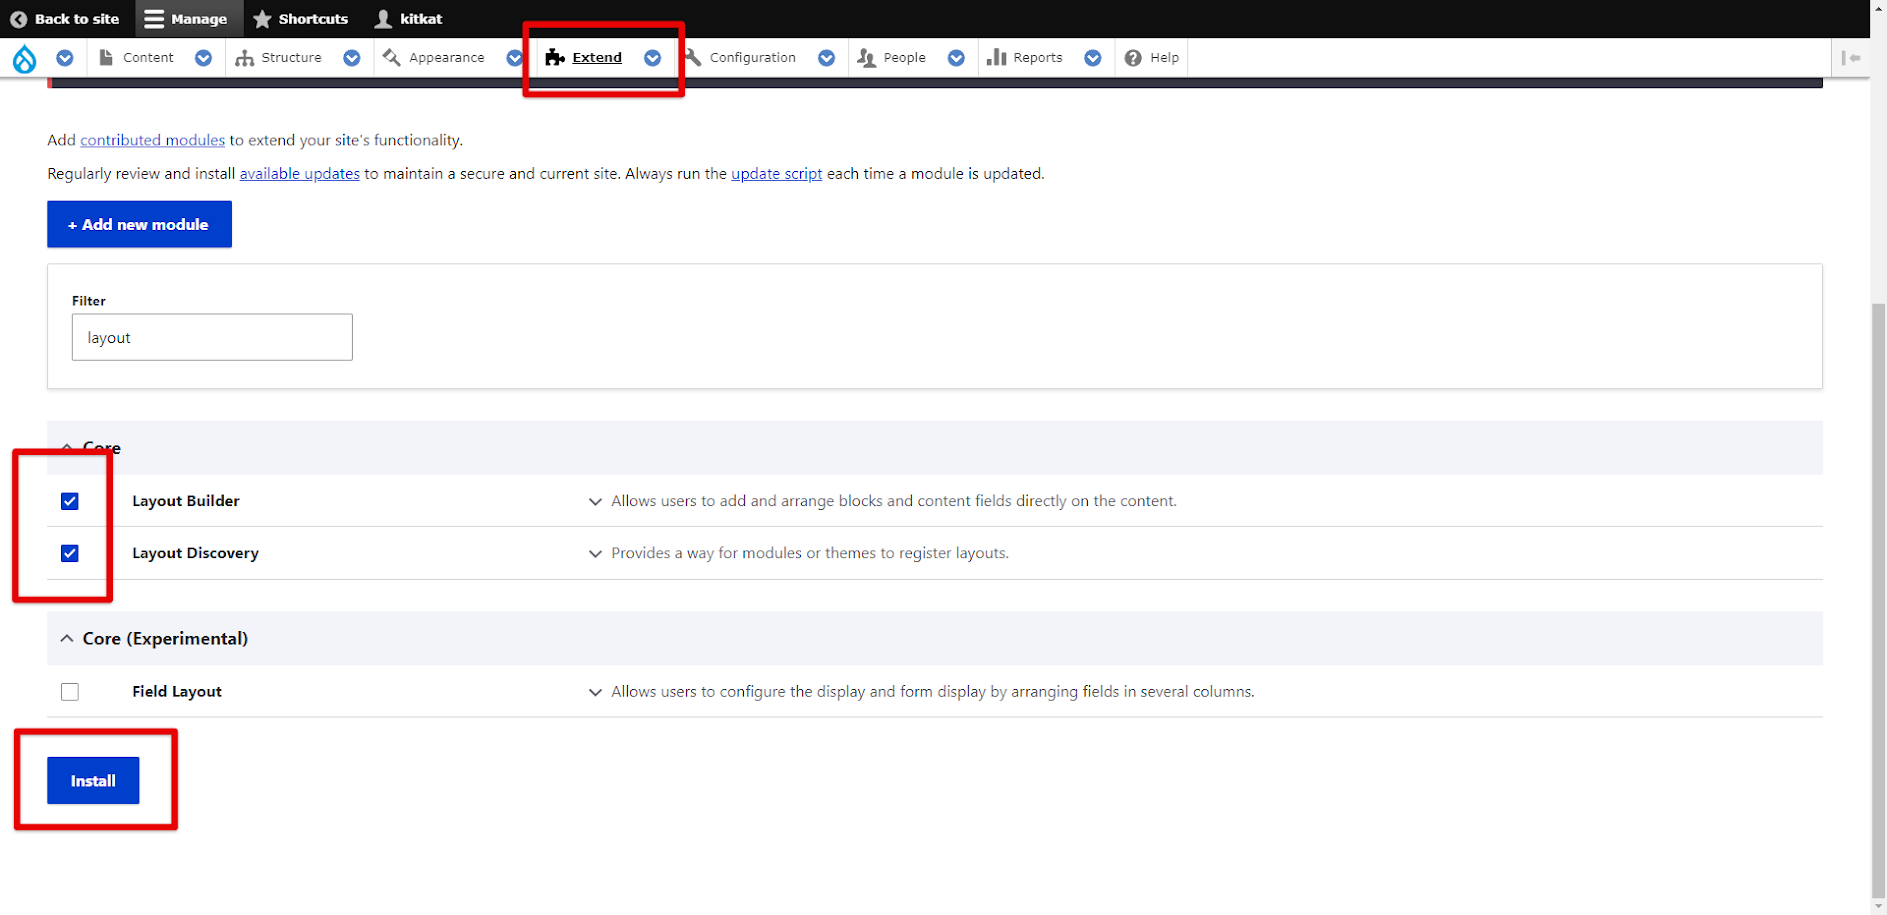
As we have mentioned before, Layout Builder is a core module. To install Layout Builder, simply navigate to the ‘Extend’ tab in the admin panel and enable both Layout Builder and Layout Discovery module. Don’t forget to click ‘Install’ at the bottom of the page.
Using Drupal 10 Layout Builder for Content Type Customization
Congrats! Now the Drupal Layout Builder module is installed on your website and ready to boost your website layouts. But what to do next?
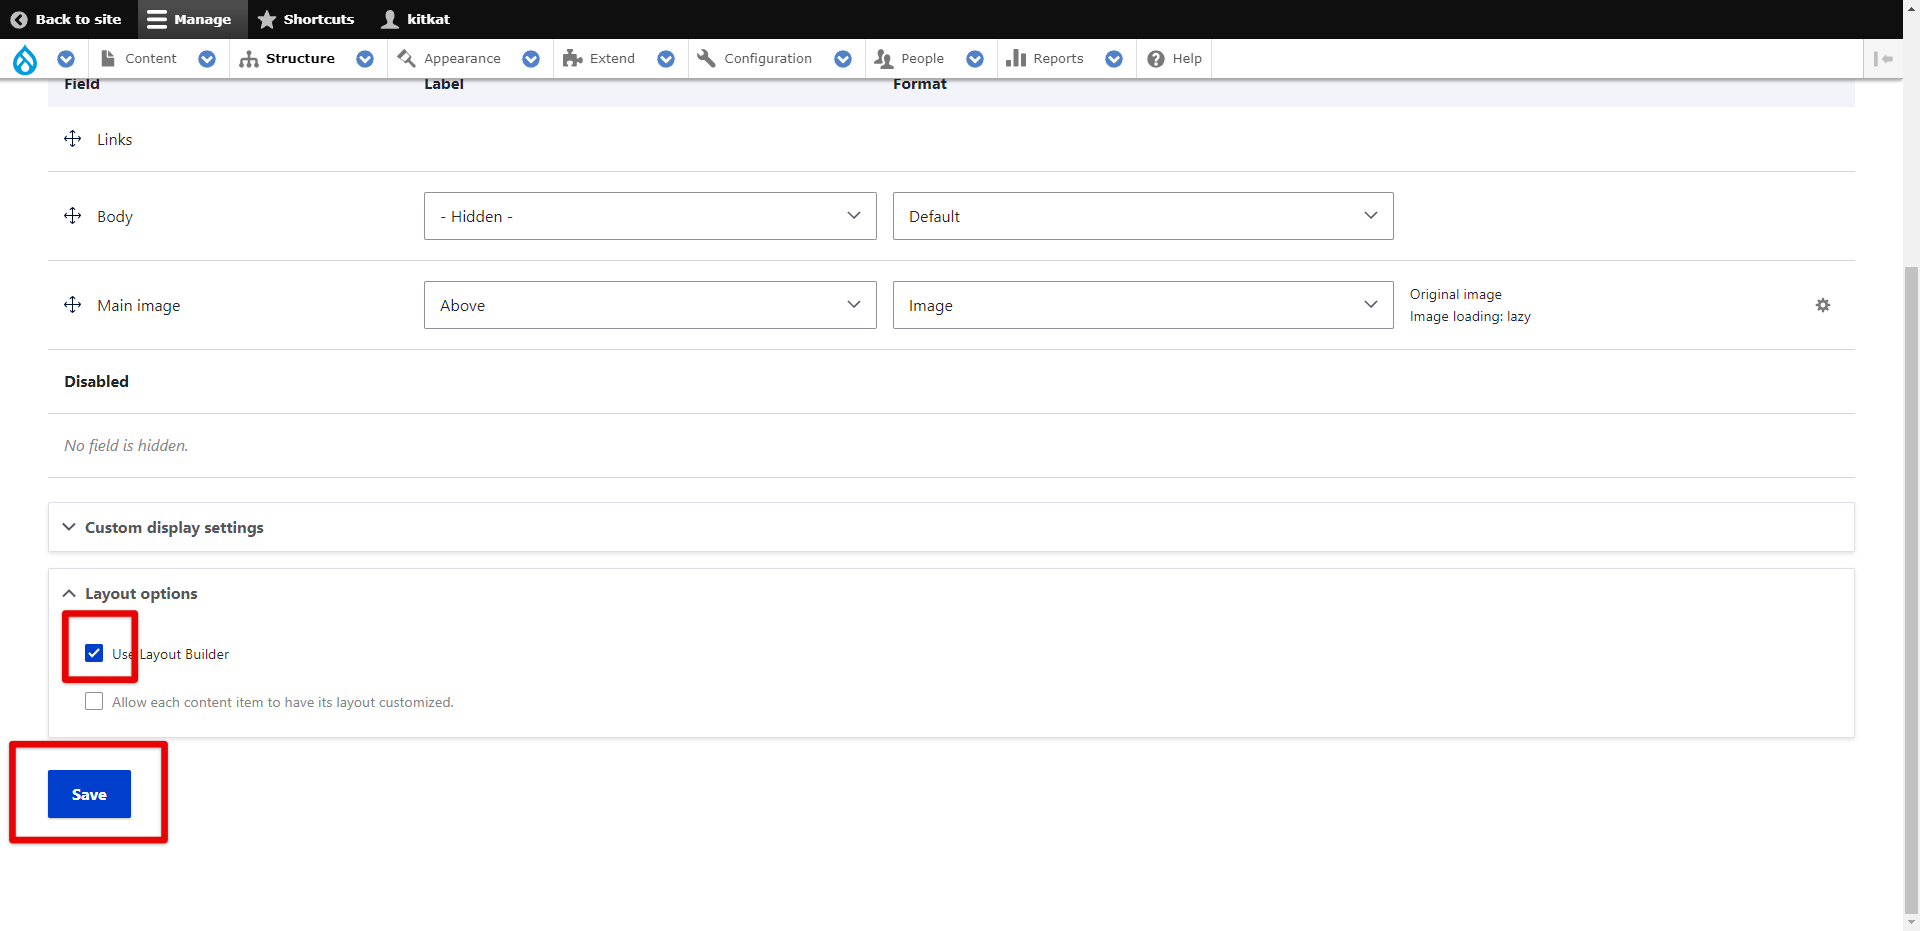
Navigate to the ‘Structure’ tab in the admin panel, then choose ‘Content Types’ and proceed to ‘Manage Display’ for any desired content type. We’ll demonstrate the functionality of this module on the ‘Recipe’ content type, but it could be any.
When the ‘Manage Display’ page for the chosen content type is opened, scroll to the bottom. You’ll see ‘Layout options’. Select ‘Use Layout Builder’ and click ‘Save’.
Once the Layout Builder is activated for the content type, you can see a ‘Manage Layout’ button in the place of fields.
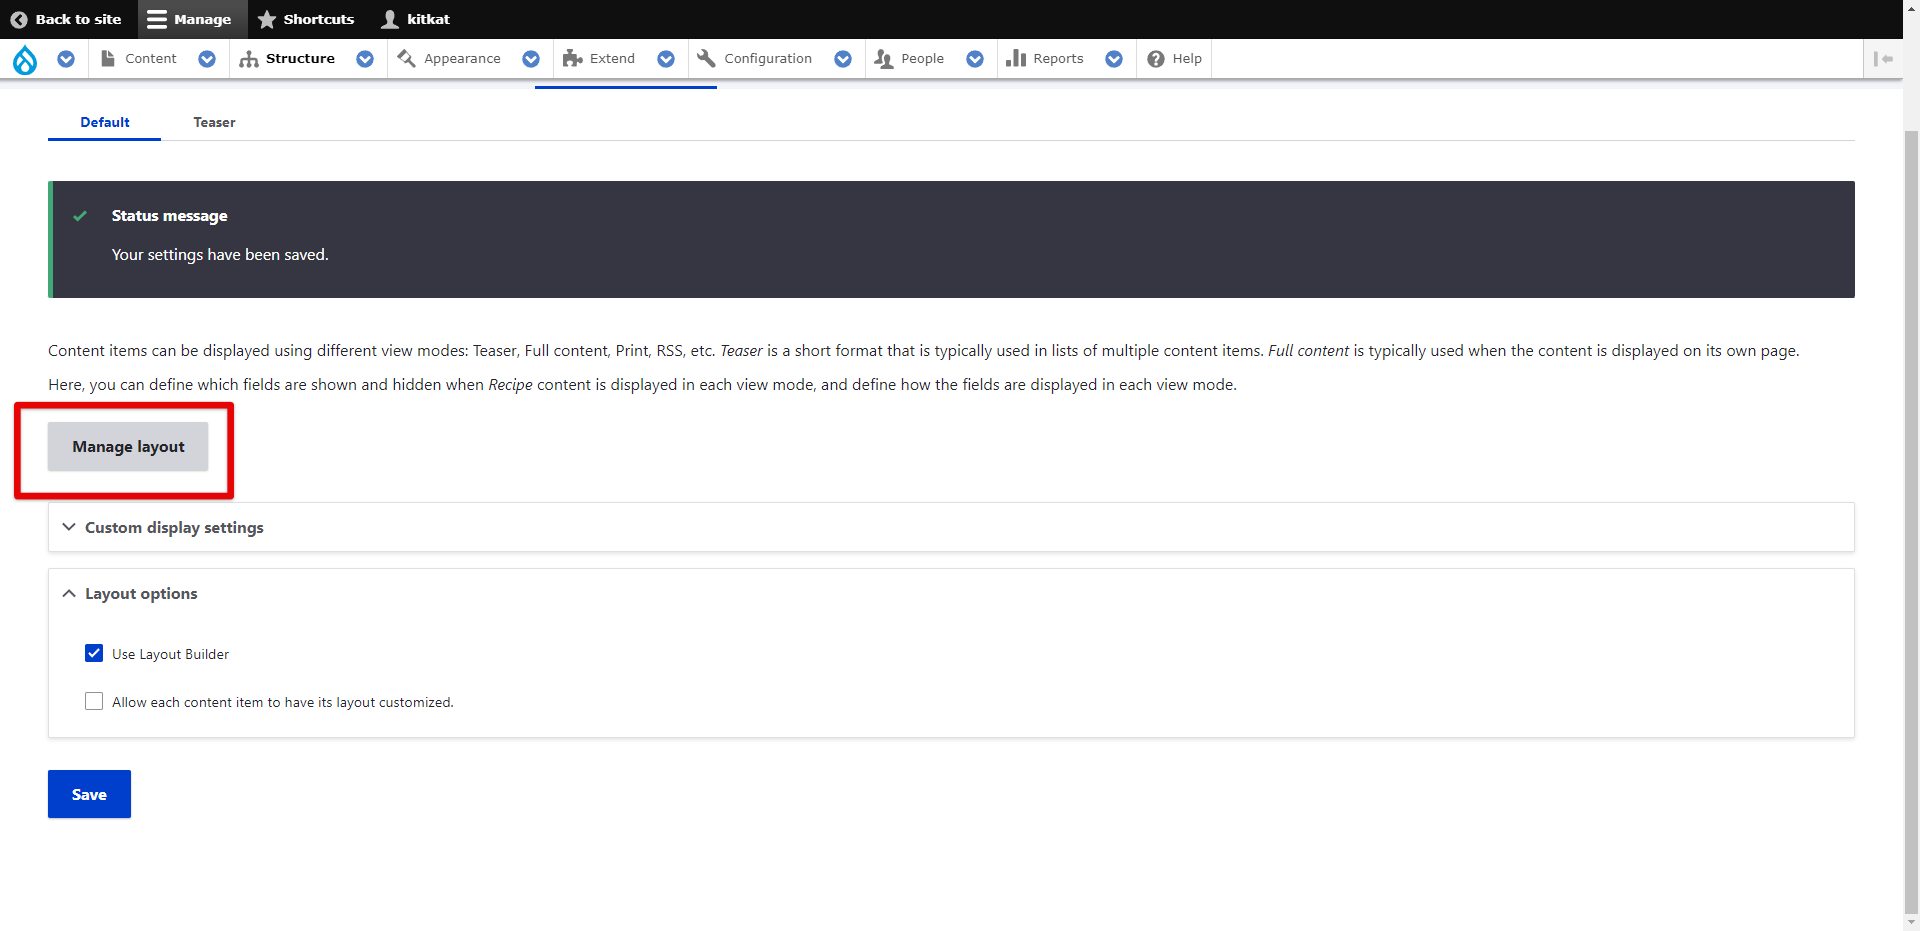
Click on this button, and you’ll be redirected to the content type layout (‘Recipe’ content type in our case).
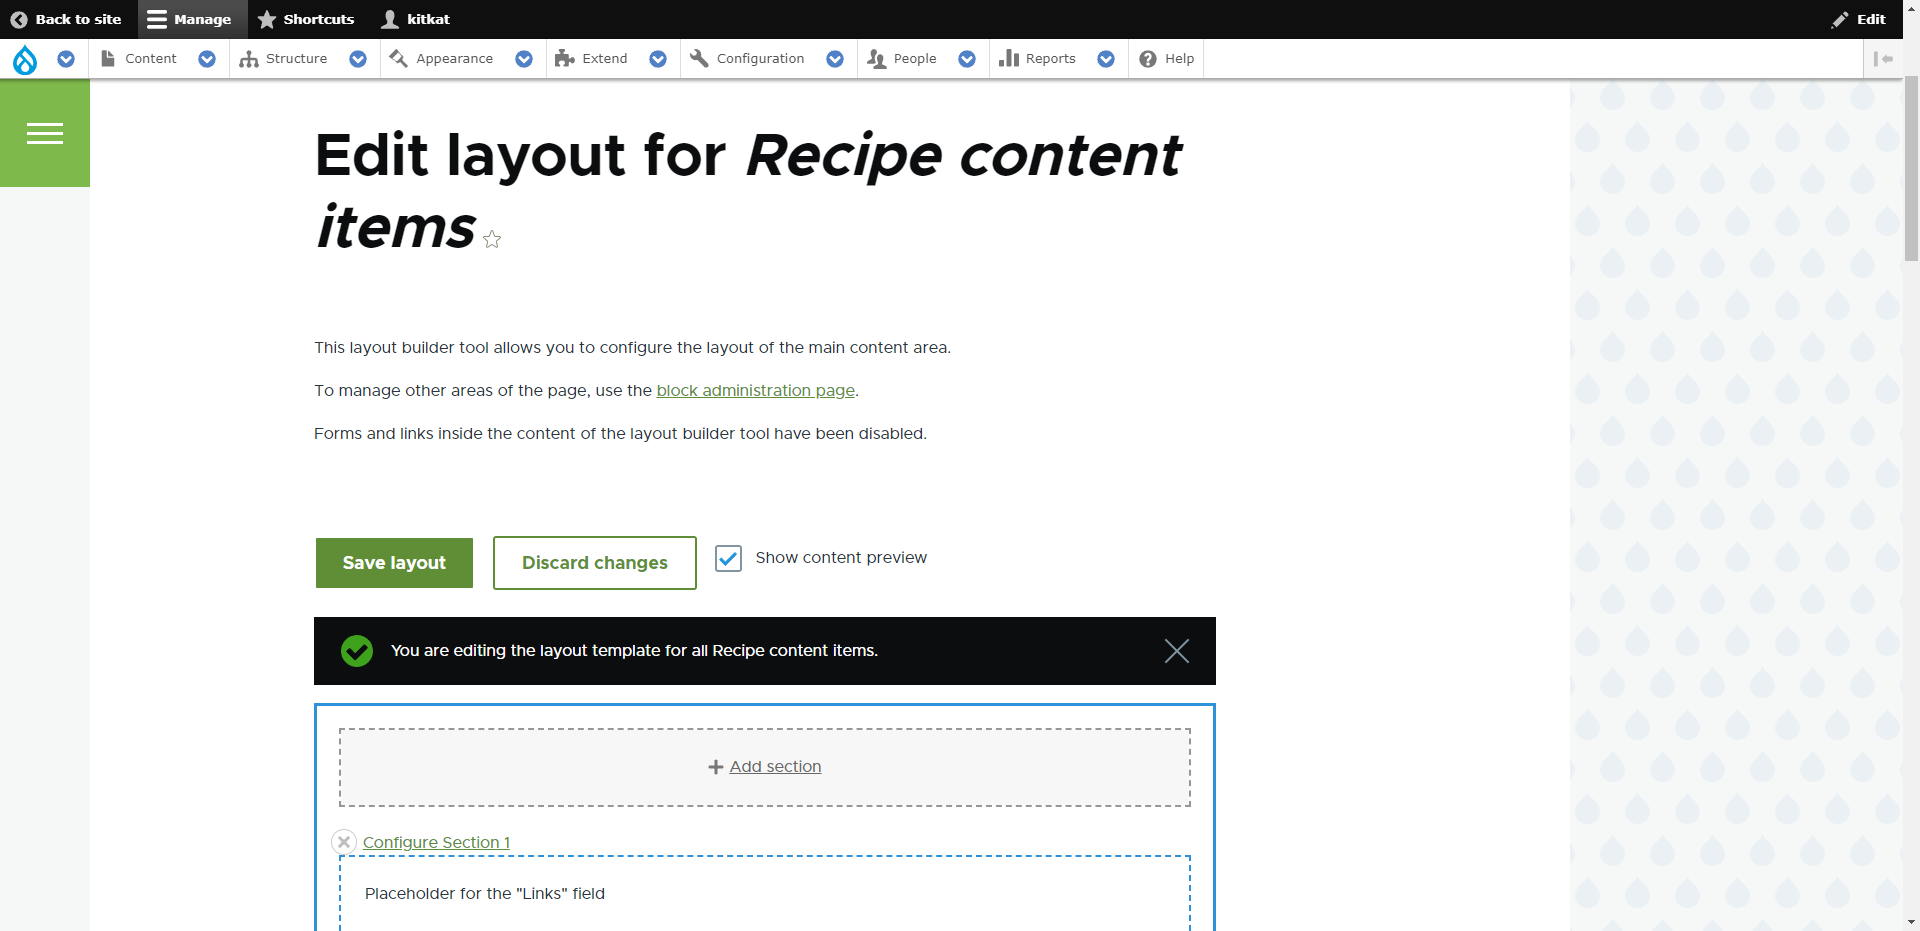
Now you can add sections to the content type layout!
Using Drupal 10 Layout Builder for Adding Sections to the Web Page
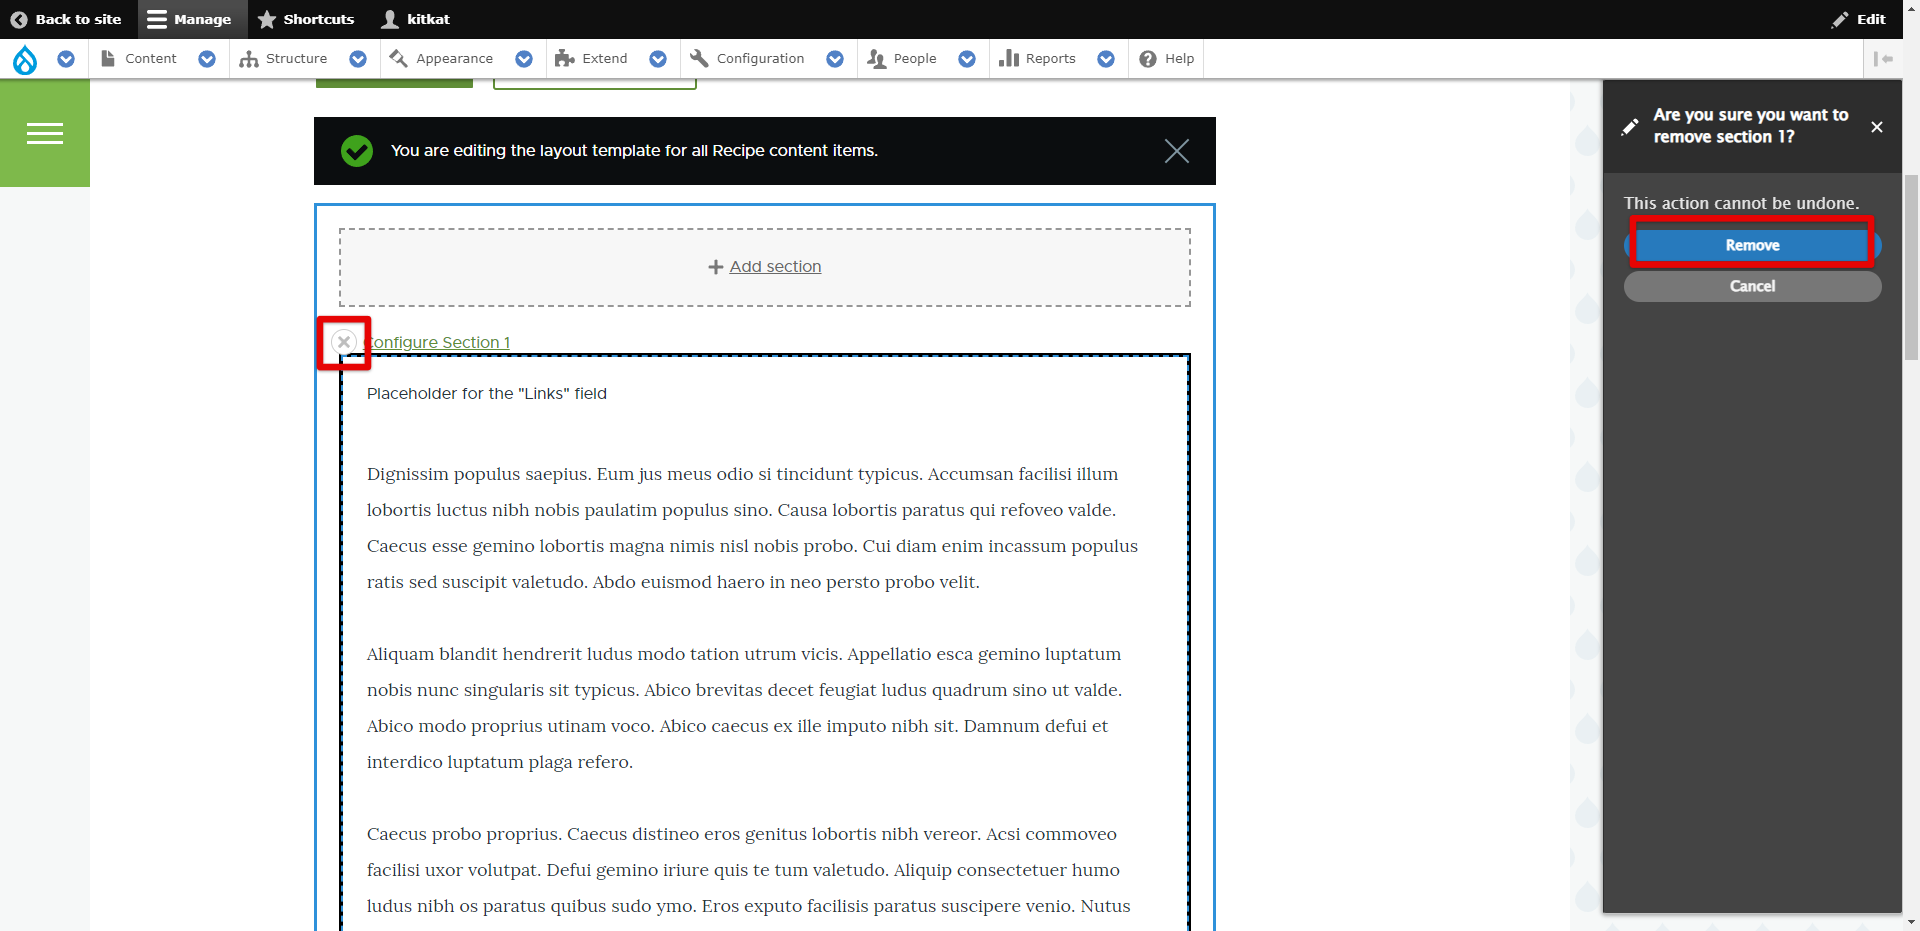
If you want to add sections to the layout, remove the default ones first. Simply click on the close icon for the section and then proceed by clicking ‘Remove’.
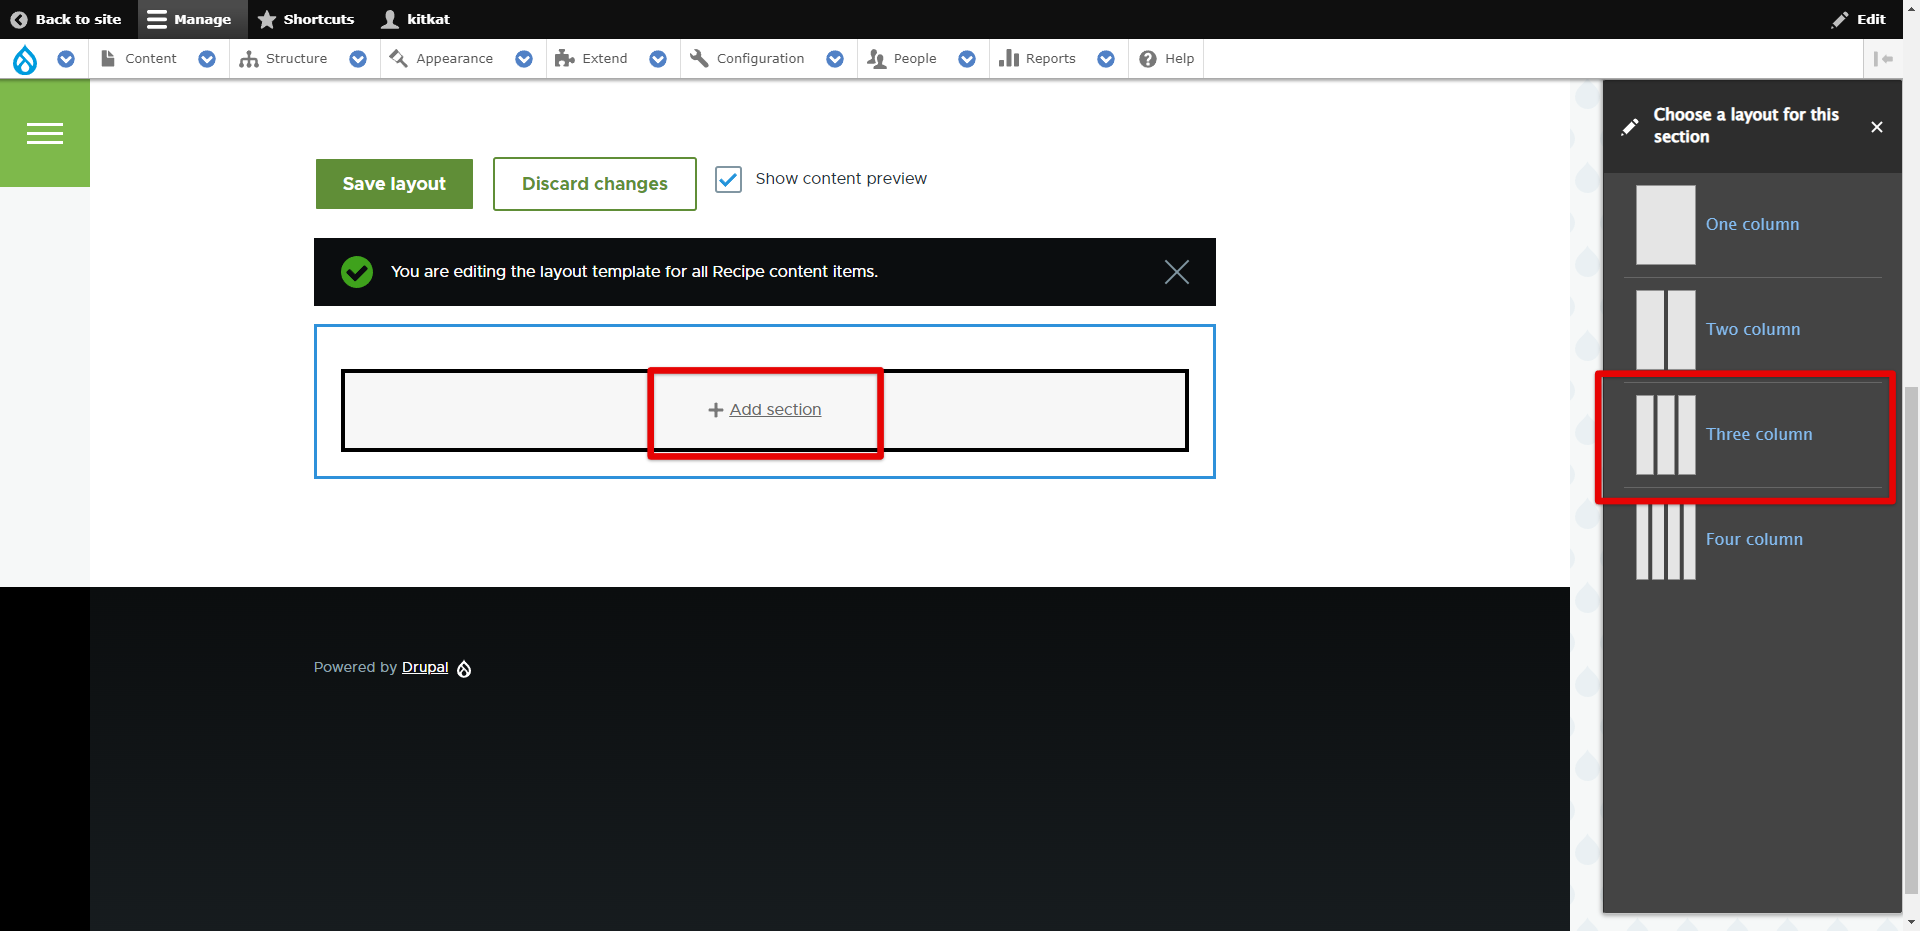
Add as many new sections as you need by clicking on the ‘Add Section’ button. After clicking on this button, you’ll be able to choose a layout for your section. We’ll choose ‘Three column Section’.
After setting the layout, you can choose column widths. After that, click on ‘Add Section’. Now you can see your new section in Layout Builder.
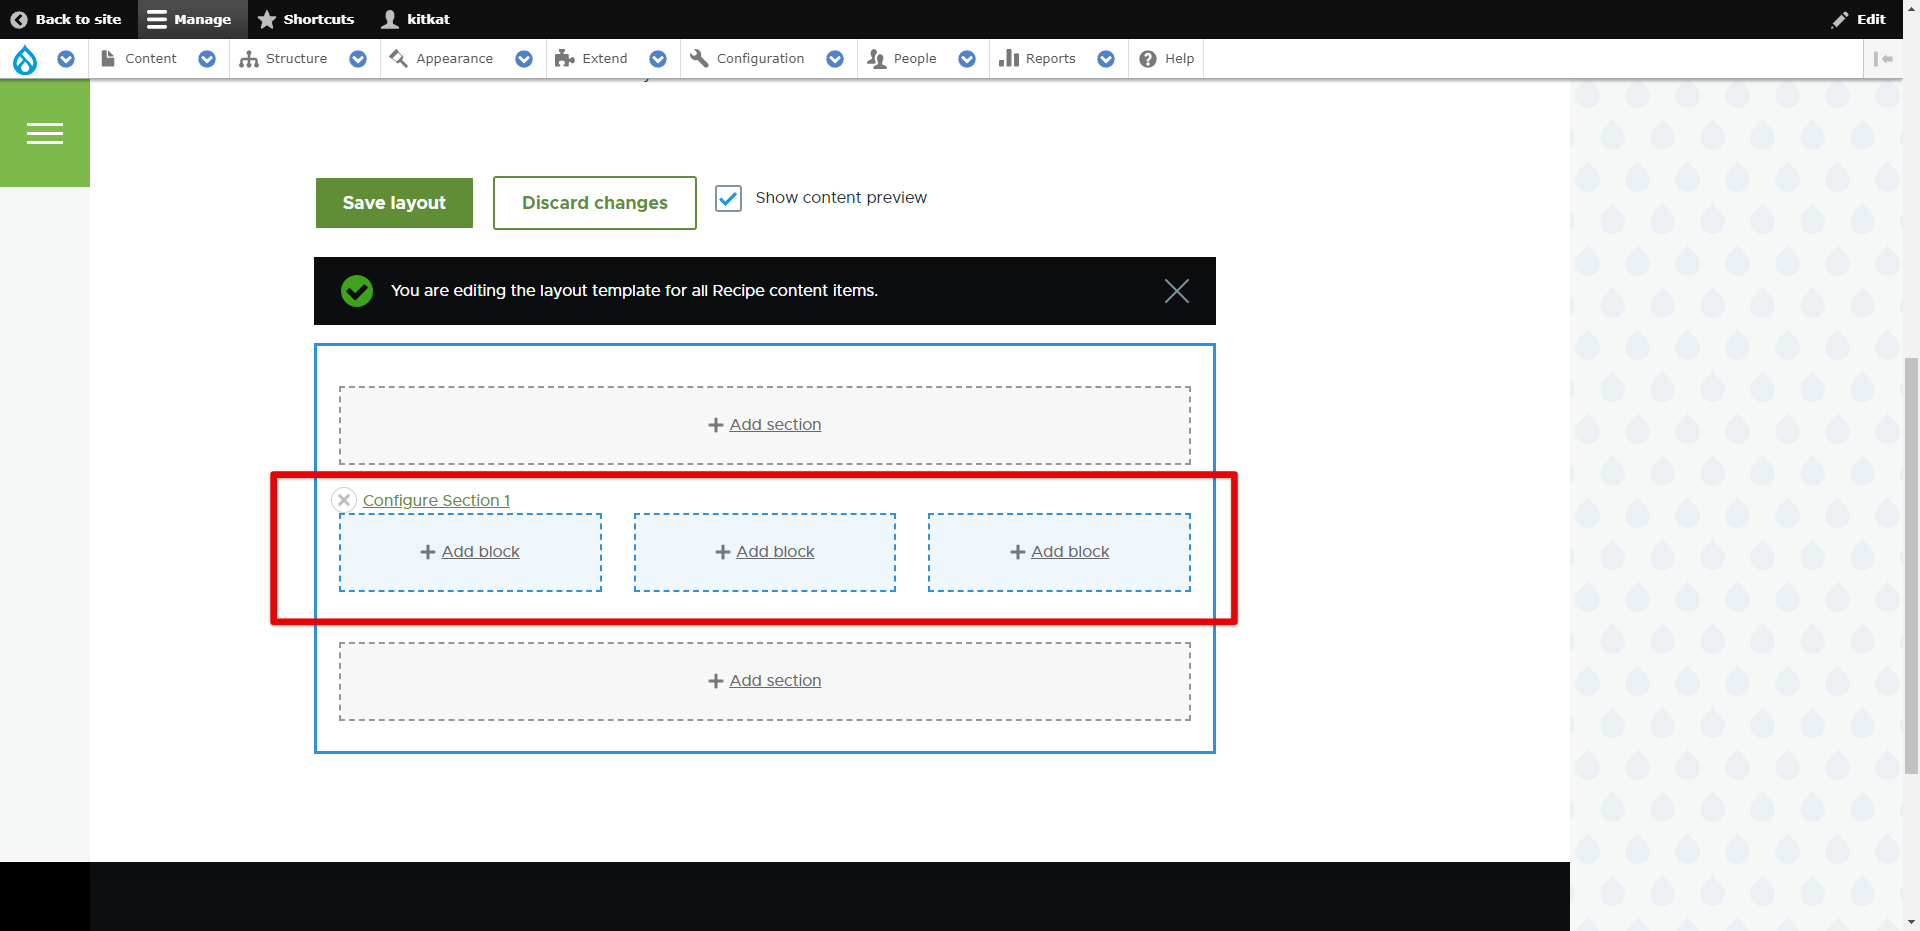
Once a new section is added to Drupal 10 Layout, you can configure blocks for it.
Using Drupal 10 Layout Builder for Adding Blocks to the Sections
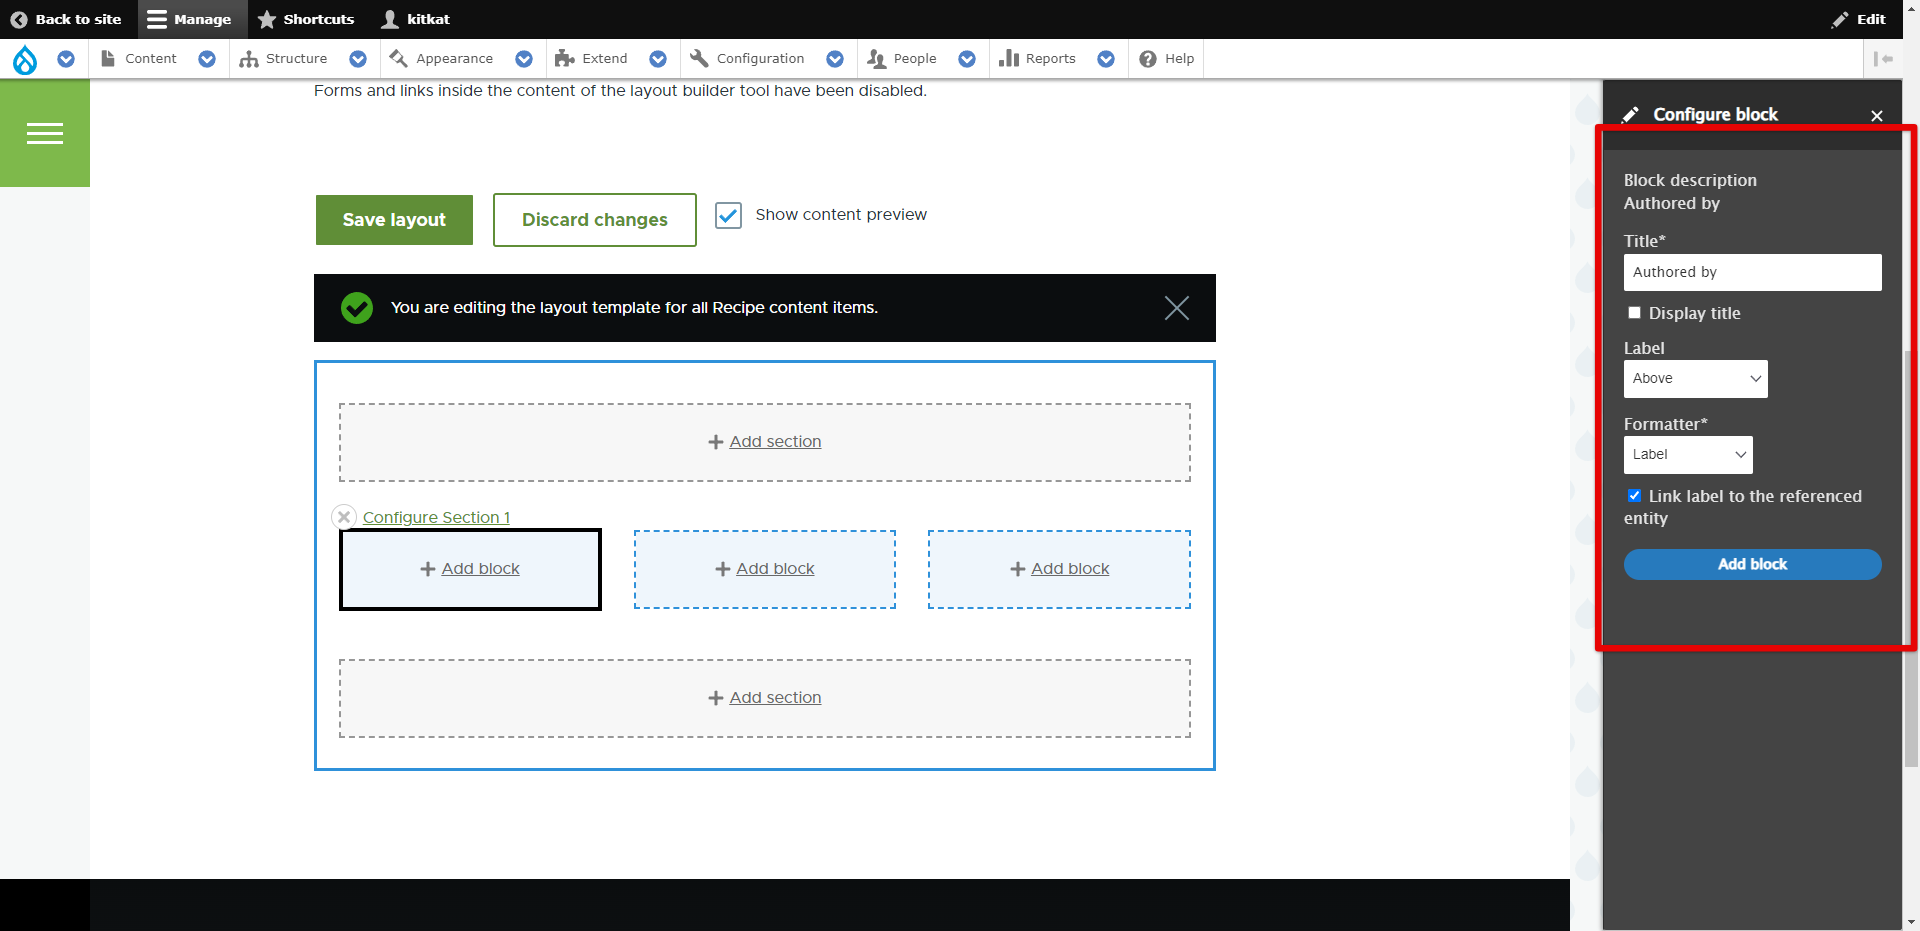
Click on the ‘+ Add Block’ button for the first column and choose the necessary block available. Here, you can also create custom blocks. To see if the desired block exists on your website, you can use the ‘Filter’ field (by block name).
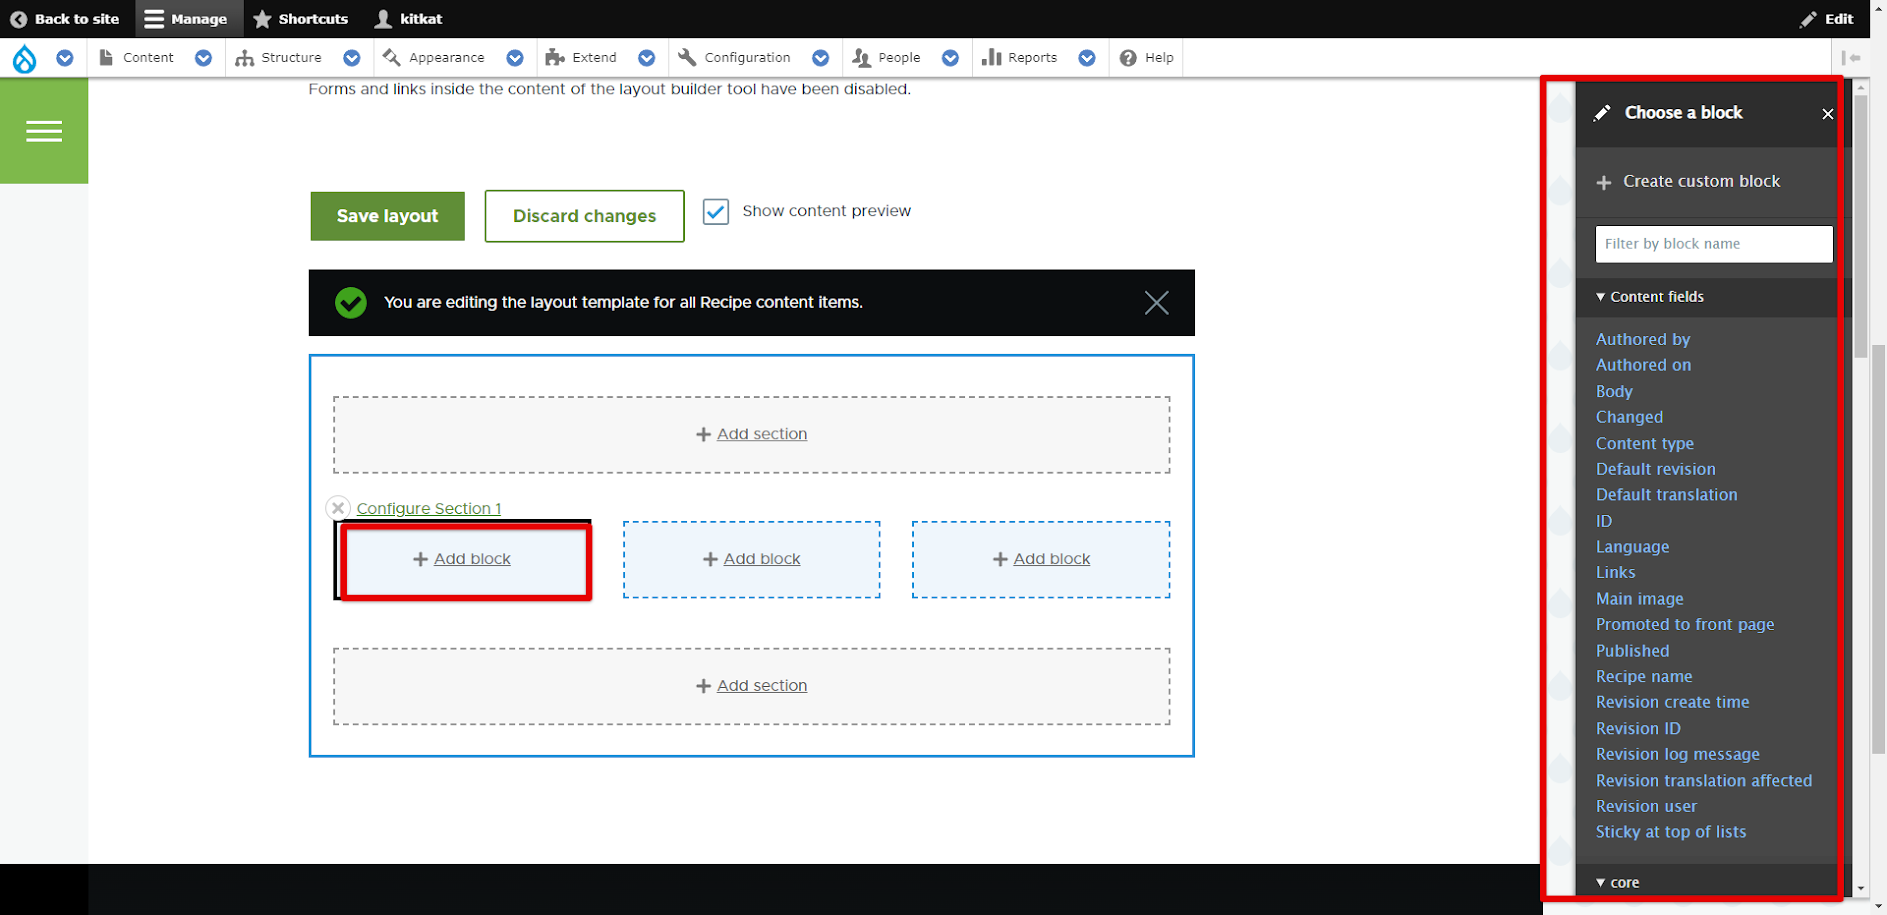
For now, we will choose the ‘Authored by’ block. After clicking on the desired block, you’ll see the configuration fields where you can adjust the fields. After everything is set up, click on the ‘Add Block’ button.
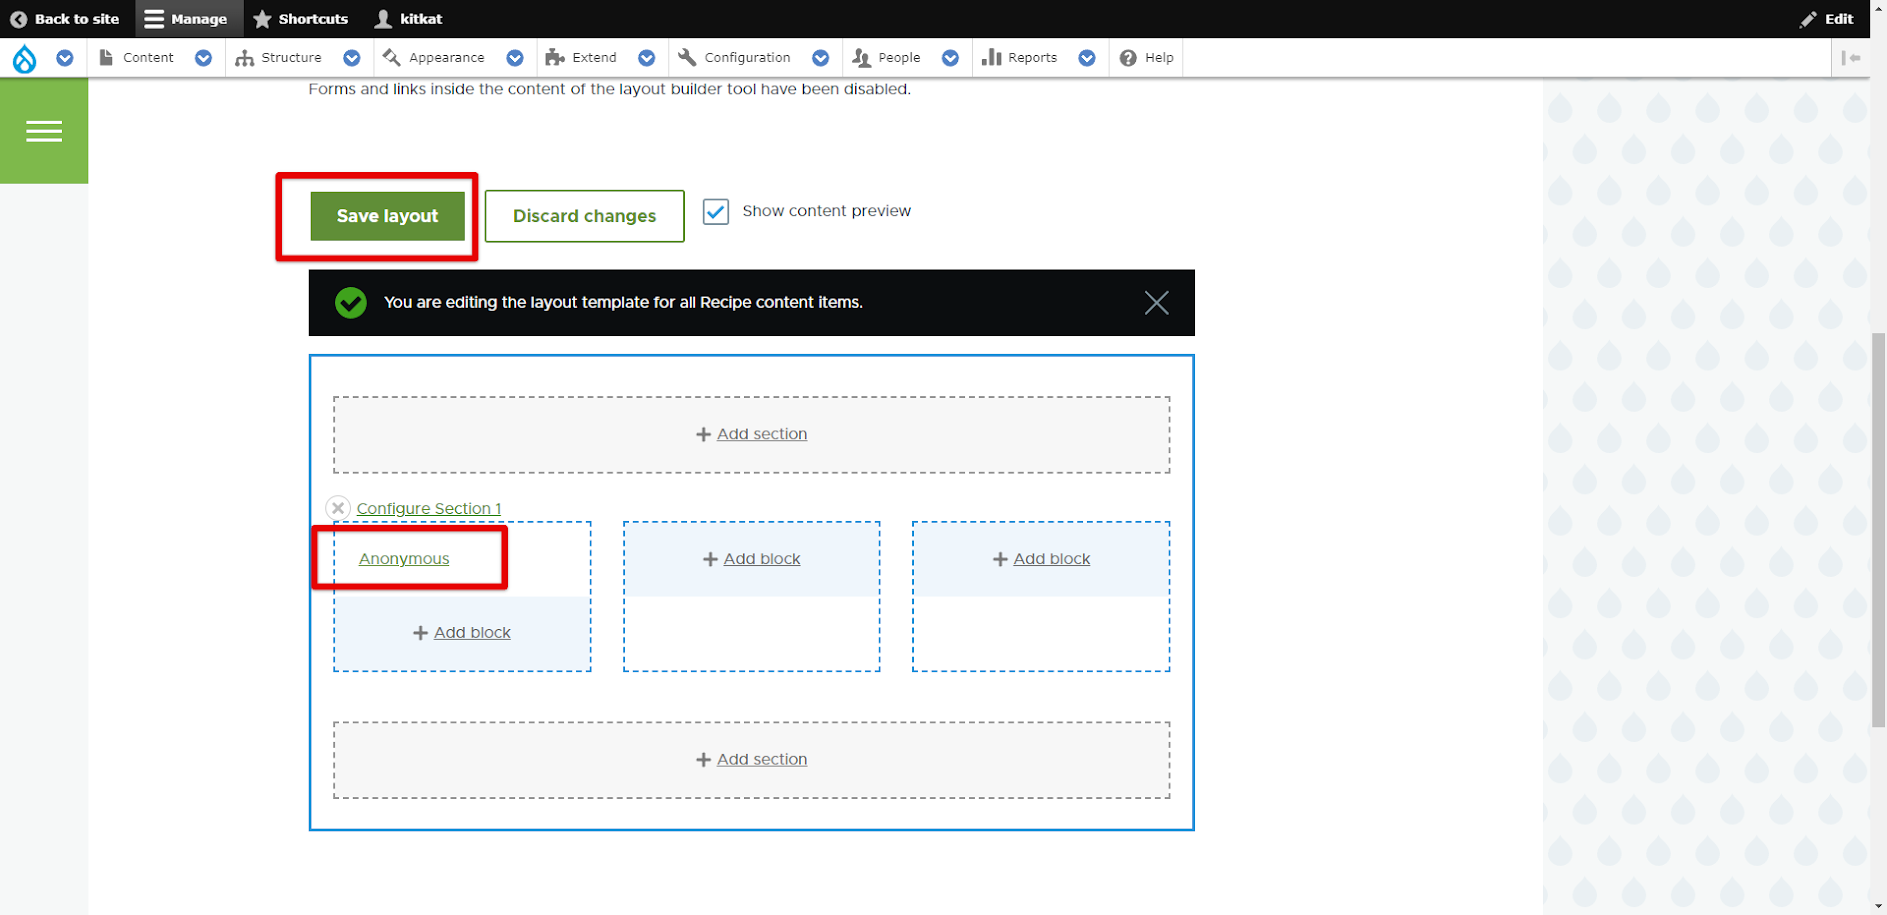
Now you can see that the ‘Authored by’ block has been added to the first column on the left. Don’t forget to save changes by clicking on ‘Save Layout’.
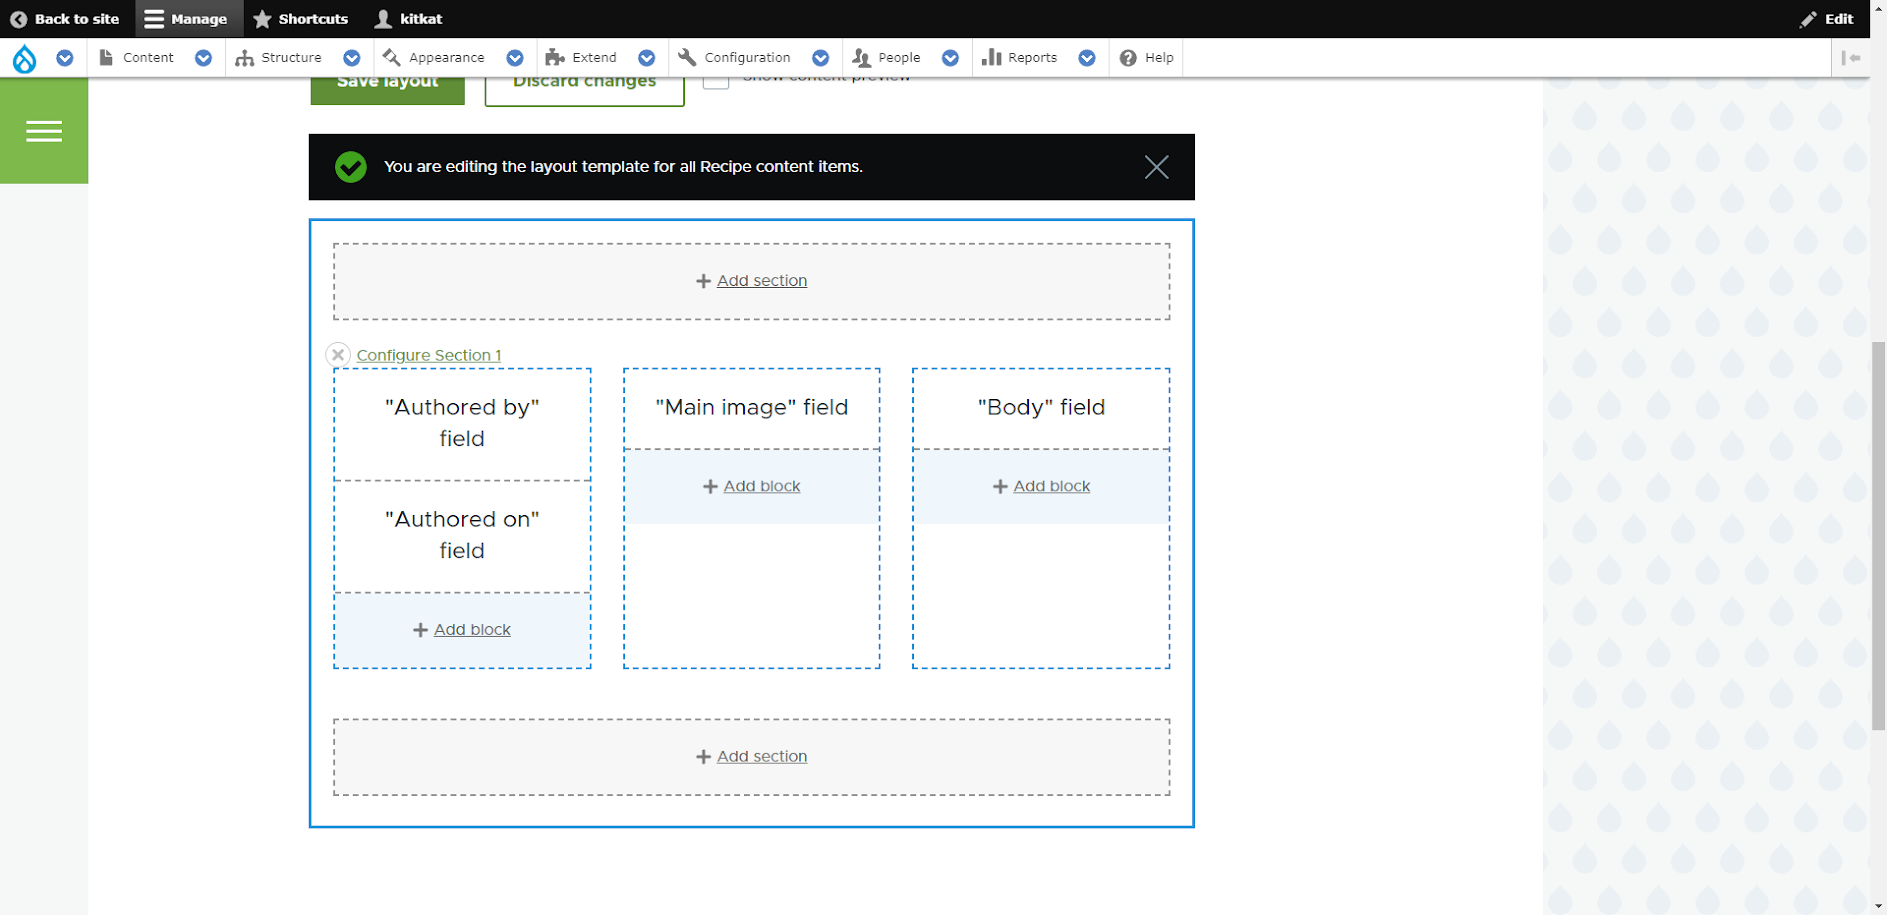
Proceed with other blocks the same way.
Note: If you don’t want the block name to be displayed on the web page, simply choose ‘Label’ → ‘Hidden’ for this block in configurations.
After configuring your layout, you can go to your chosen content type web page to see your work done.

Congratulations! Now you can use Drupal 10 Layout Builder to build layouts for your web pages!
Final Thoughts
The Drupal 10 Layout Builder was developed with ease of usage in mind, so any website owner or content creator can manage layouts without coding skills. This user-friendly and intuitive Drupal core module offers unlimited possibilities for configuring layouts via User Interface.
If you need any assistance with Drupal Layout Builder, want to develop custom layouts for your business website, or need any further Drupal support and maintenance, don’t hesitate to contact the Drupfan team!